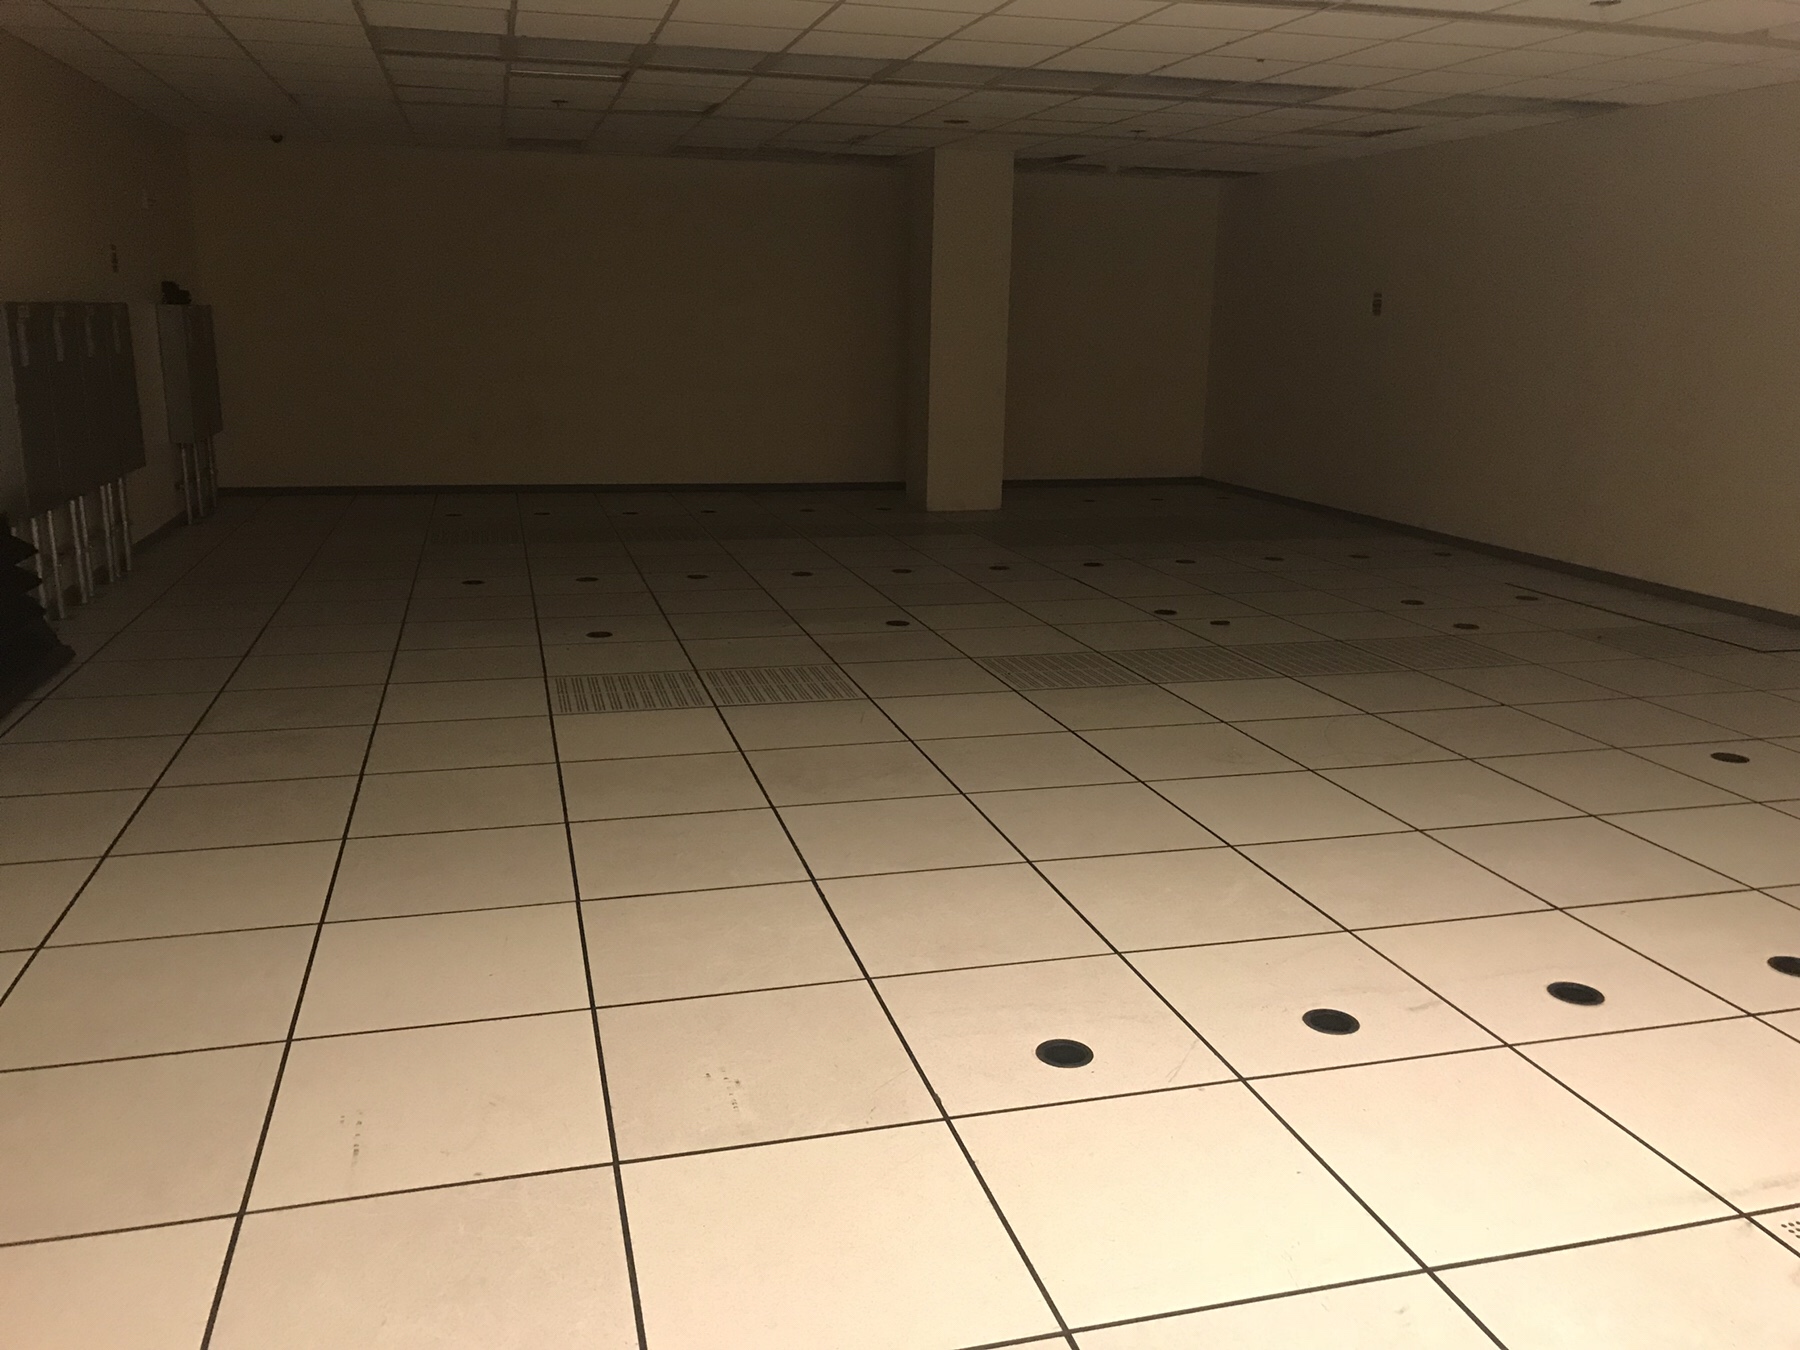
This is a photo of the old DC a few weeks after we made the move.
Before:
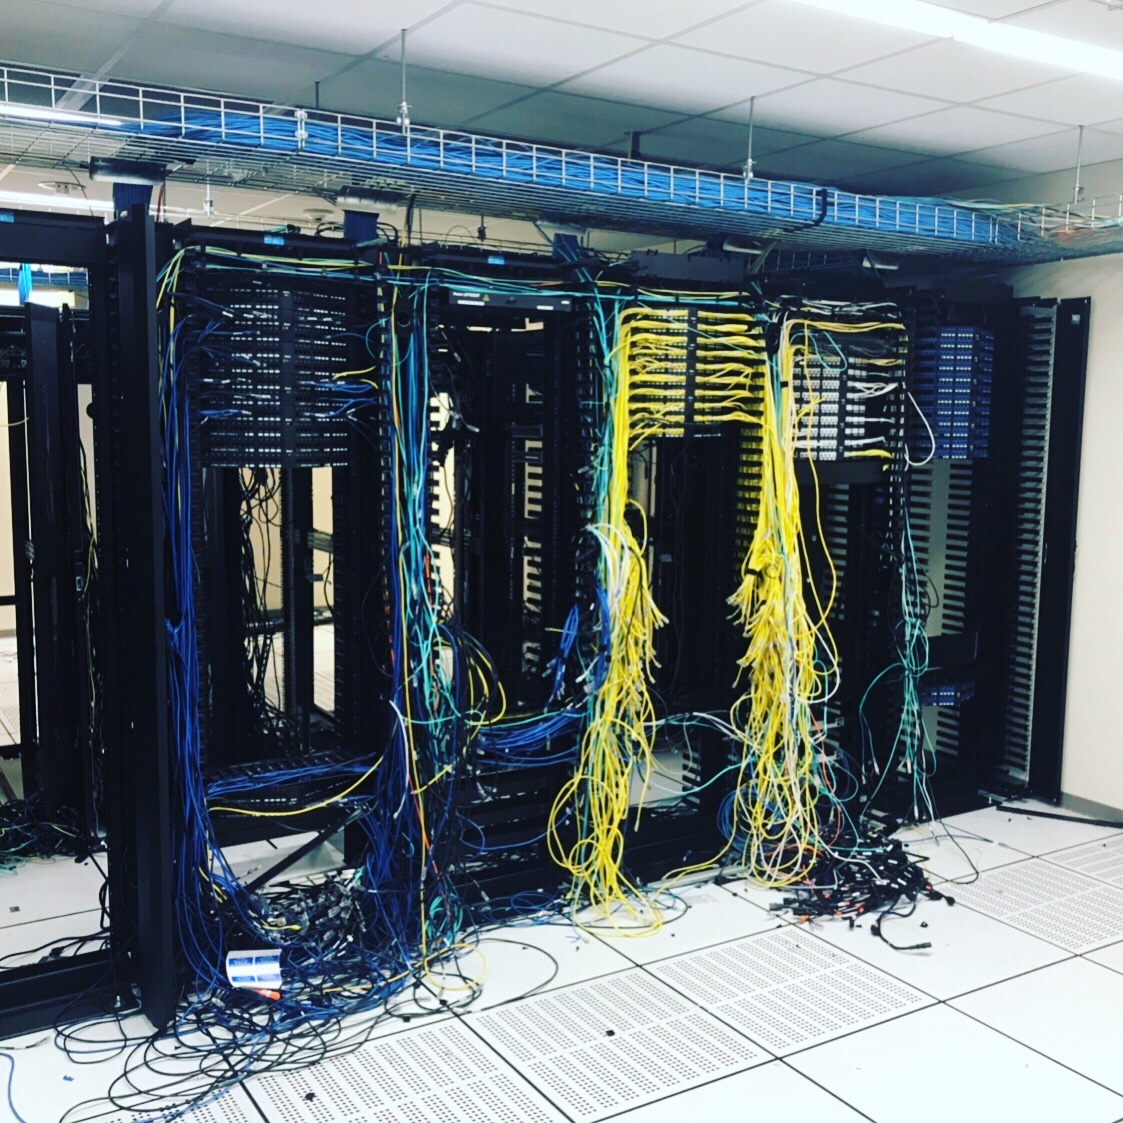
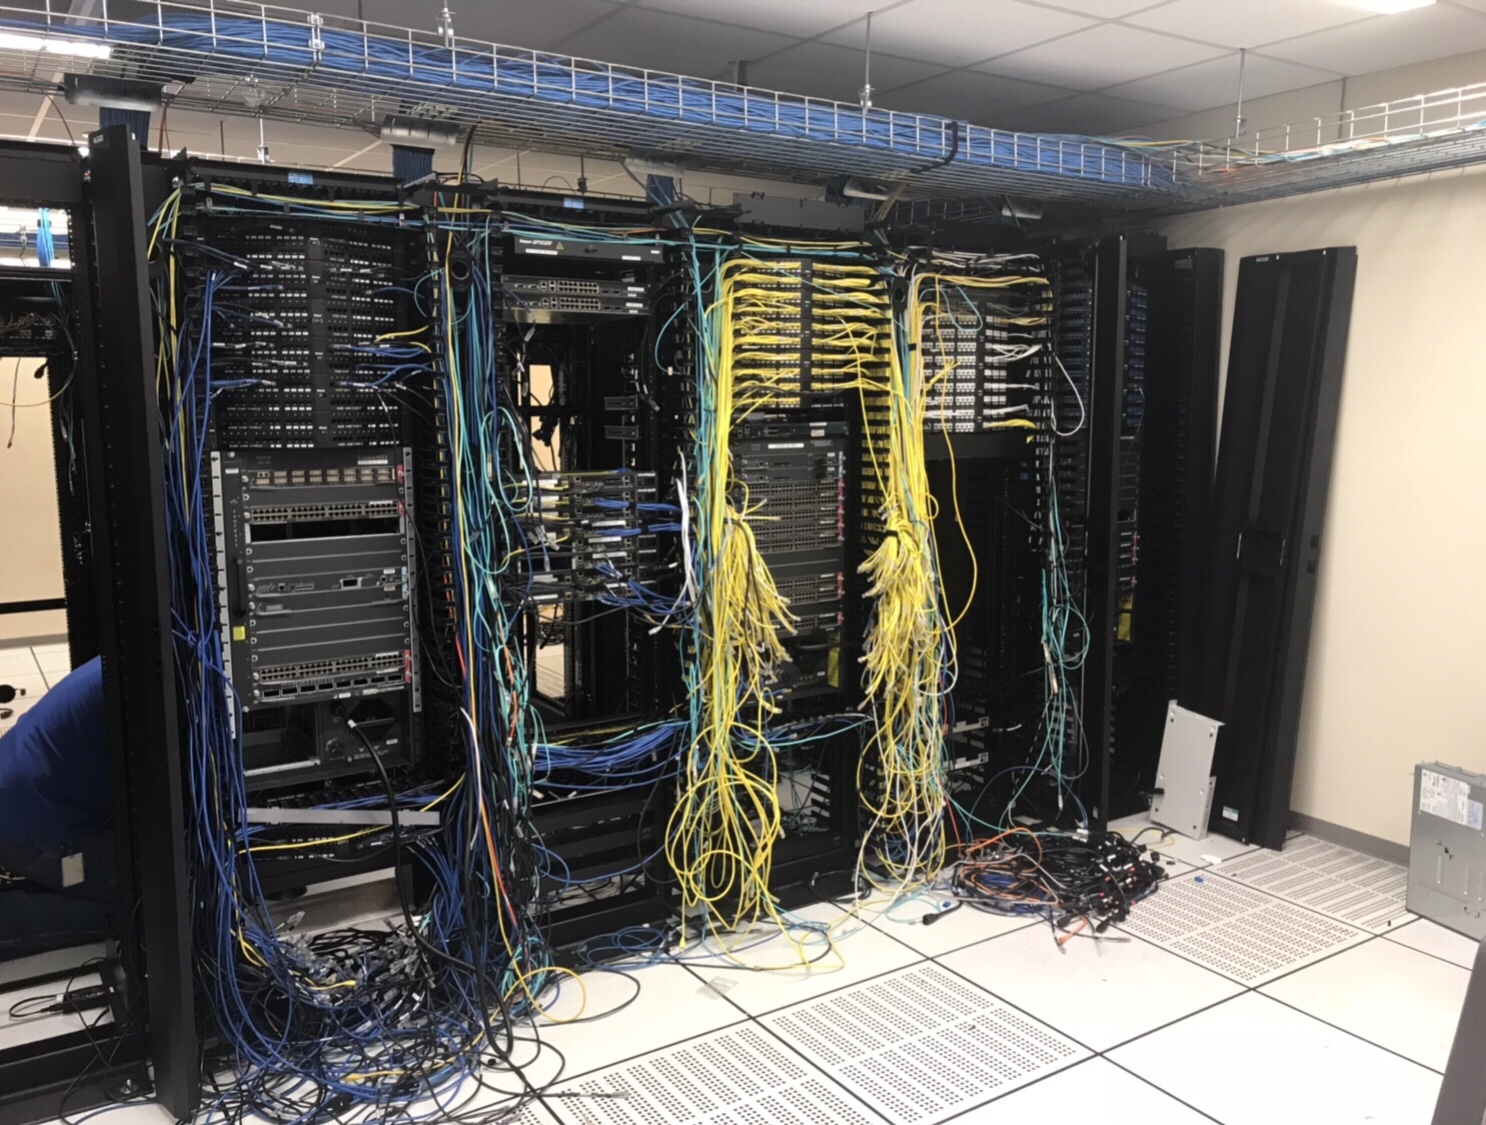
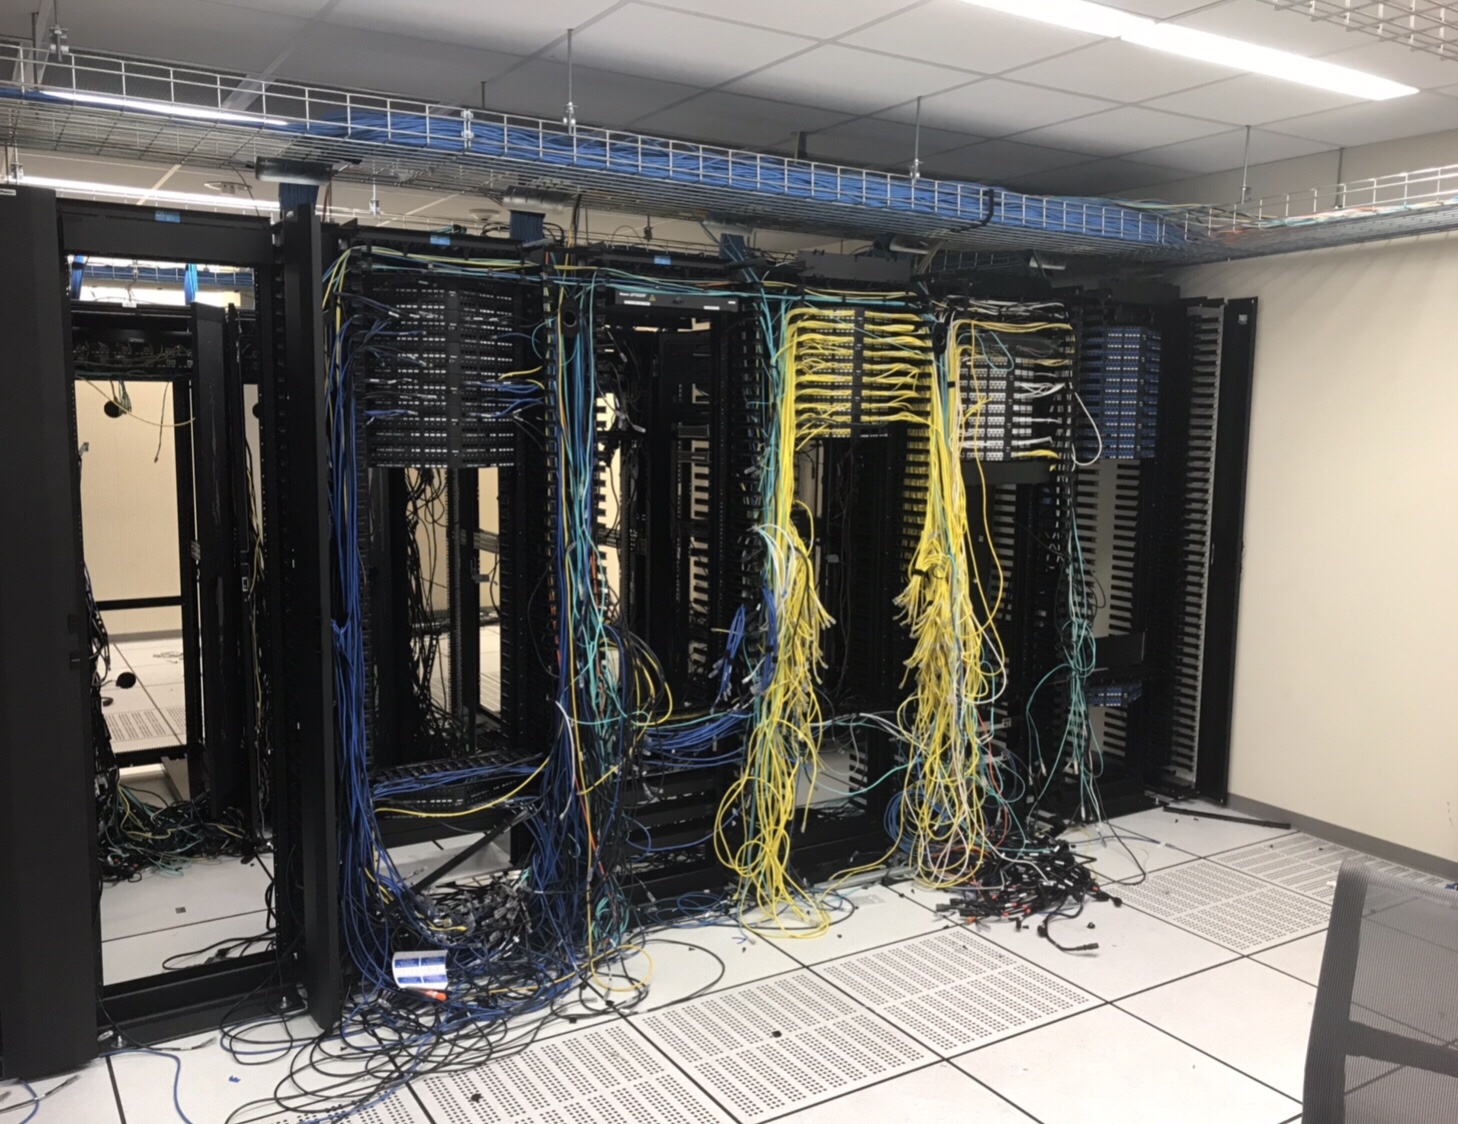
After:


Where Packets can be made to stand up and dance.
This is a photo of the old DC a few weeks after we made the move.
Before:
After:
This describes how to enable MACSec (Media Access Control Security) Encryption between two Catalyst Switches. MACSec is the standard for authenticating and encrypting the data link layer between switches. IEEE 802.1.AE.
Configuring MACSec
interface TenGigabitEthernet1/0/48
   cts manual
   no propagate sgt
   sap pmk 0000000000000000000000000000000000000000000000000000001234ABCDEF mode-list gcm-encrypt null no-encap
Below is an example config for Macsec with AES-256 encryption. This config needs to be on both sides of the switches. Was tested on a 3650-12x48UZ running ios-xe version 16.3.2. Please update the keystring each time you use it with another random set of digits. The length of the string has to be the same as below (64).
key chain mka_keychain macsec
    key 1234
    cryptographic-algorithm aes-256-cmac
 key-string 7586258746587645873490731985370957385753195709435175415784768466
 lifetime local 00:00:00 Jan 1 2000 infinite
 mka policy mka_policy_256
  key-server priority 2
 macsec-cipher-suite gcm-aes-256
interface GigabitEthernet1/0/1
 switchport mode trunk
 macsec network-link
 mka policy mka_policy_256
 mka pre-shared-key key-chain mka_keychain
Checking to Make sure the MKA Session is up and secure.
Switch#sh mka session

Total MKA Sessions....... 1

      Secured Sessions... 1

      Pending Sessions... 0

====================================================================================================

Interface      Local-TxSCI         Policy-Name      Inherited         Key-Server

Port-ID        Peer-RxSCI          MACsec-Peers     Status            CKN

====================================================================================================

Te1/0/48       00f6.6389.8b30/0037 test             NO                YES

55             00fe.c8d4.44b0/0037 1                Secured           1234000000000000000000000000000000000000000000000000000000000000

Verify MACSec is enabled.

Switch#sh macsec int ten1/0/48

MACsec is enabled
   Replay protect : enabled
   Replay window : 0
   Include SCI : yes
   Use ES Enable : no
   Use SCB Enable : no
   Admin Pt2Pt MAC : forceTrue(1)
   Pt2Pt MAC Operational : no
   Cipher : GCM-AES-256
   Confidentiality Offset : 0
Download “Set” Command backup for Palo Alto
Settings > All Settings > NCM Settings > Advanced > Device Templates > Search ‘Palo Alto’ > Select ‘PaloAlto5050’ > Click Copy > Change Template Name ‘PaloAlto5050 – Set’ > Remove the XML information and then Copy and Paste the XML below > Click Save
<Configuration-Management Device="Palo Alto" SystemOID=" 1.3.6.1.4.1.25461.2.3">
 <Commands>
 <Command Name="RESET" Value="set cli pager off${CRLF}set cli config-output-format set${CRLF}configure" RegEx="#" />
 <Command Name="EnterConfigMode" Value="" />
 <Command Name="ExitConfigMode" Value="exit" />
 <Command Name="Startup" Value="saved running-configuration" />
 <Command Name="Running" Value="" />
 <Command Name="DownloadConfig" Value="show ${ConfigType}" />
 <Command Name="UploadConfig" Value="" />
 <Command Name="DownloadConfigIndirect" Value="" />
 <Command Name="SaveConfig" Value="commit" />
 <Command Name="Version" Value="show" />
 </Commands>
 </Configuration-Management>
Change the Template being used on the Palo Alto Nodes
Settings > Manage Nodes > Palo Alto > Select All > Edit Properties > Tick Communication > Select Device Template ‘Palo Alto5050 – Set’ > Submit.
Add Device
Settings > Manage Nodes > Add Node > Follow the Wizard.
Edit Node
Find Device > Edit Node > NCM Properties
Configurations Normally download to : \SolarWinds\Orion\NCM\Config-Archive
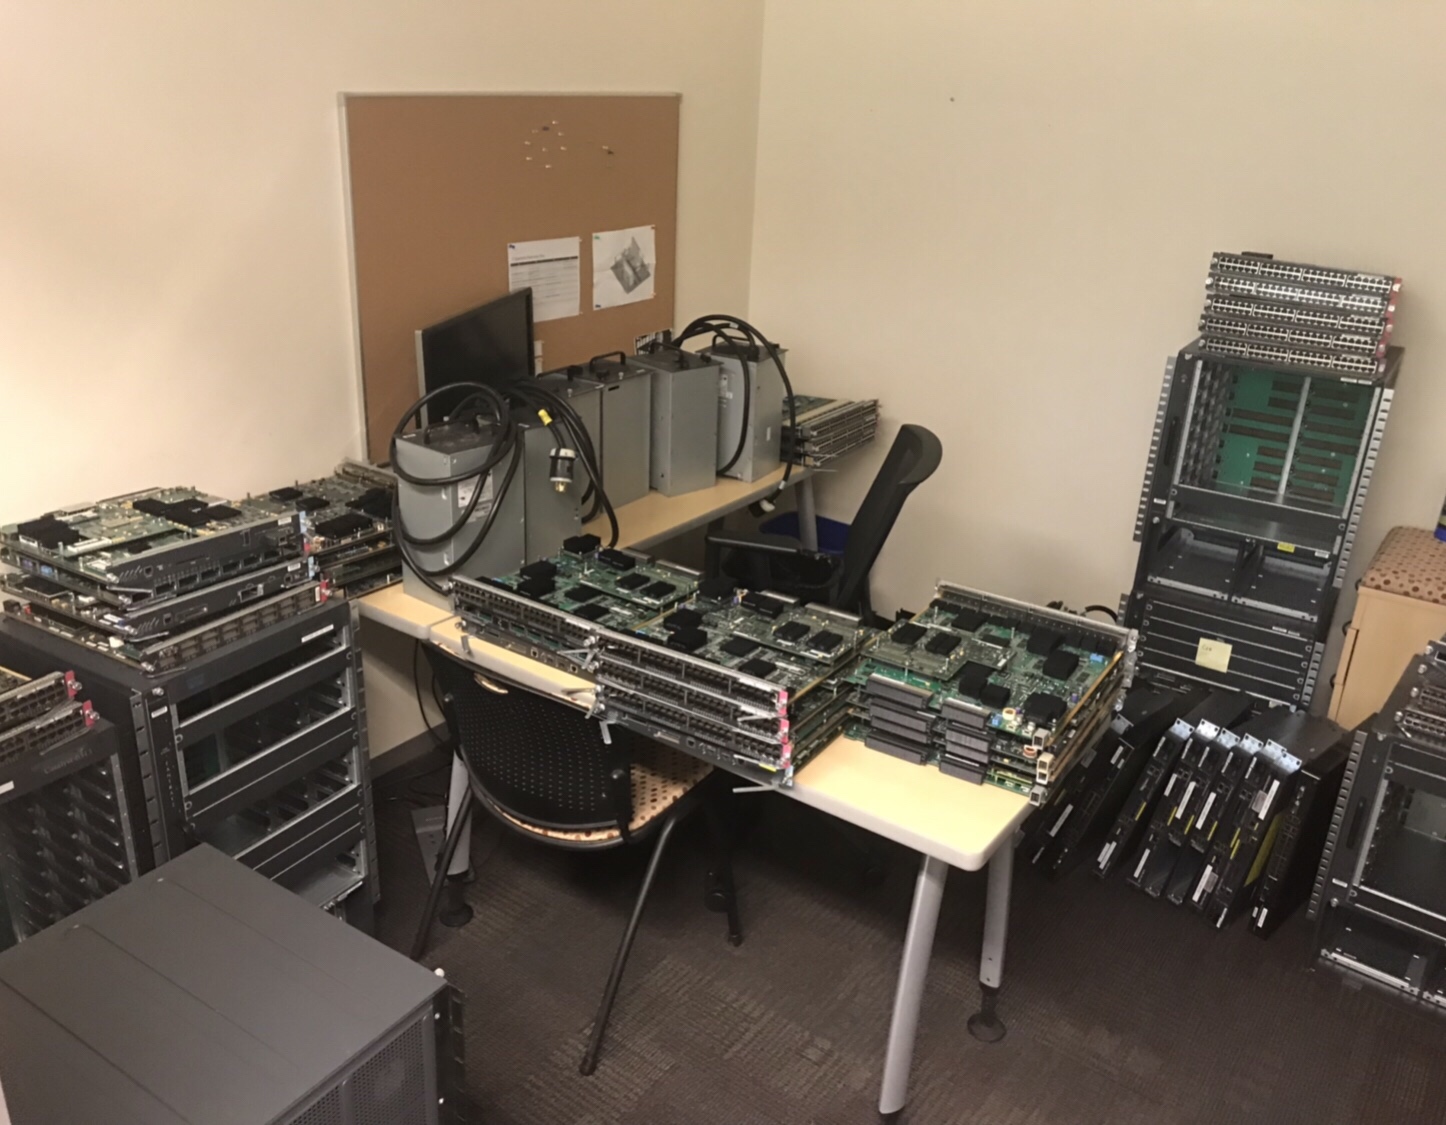
We moved our company internal Data Centre to a COLO Facility 2 weeks ago, here is what is left. Before and After Pictures, as well as a photo of the “Boneyard”. A pretty good haul for E-Wasting:
2x Cisco 6909’s
3x Cisco 6513’s
8x Cisco ASA’s
2x Brocade Loadbalancers
4x Cisco 2900 Routers
2x Cisco Nexus 5k
1x Cisco Wireless LAN Controller
We have been working to migrate off the old Cisco ASA Firewalls for 3 months, we swung over the final VLAN today and turned off the 2nd of 3 Cisco ASA’s. Huge Achievement!!! Two more to go. Here is a video of me doing the honor.
We have been working to migrate off the old Cisco ASA Firewalls for 3 months, we swung over the final VLAN today and turned off the 1st of 3 Cisco ASA’s. Huge Achievement!!! Two more to go. Here is a video of my colleague Tom doing the honor of turning it off.
I only use SuperPutty with GNS3, here is how.
This install is intended for running IOU/IOL images on the GNS3 VM because it is the preferable way of running IOS in GNS3 now.
Pre-Requisites:
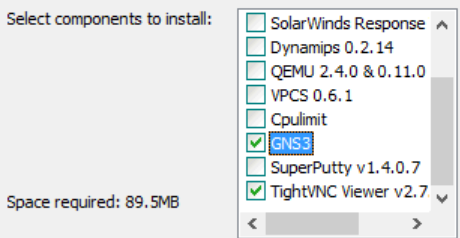
Install GNS3:
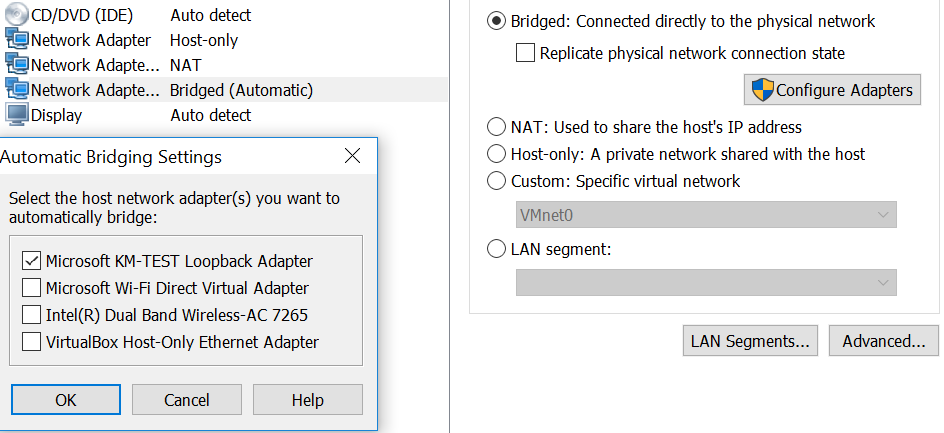
Install Loopback Adapter
cd “c:\Program Files\gns3”
loopback-manager.cmd
Setup GNS3 VM:
Configure GNS3 to use the GNS3 VM server:
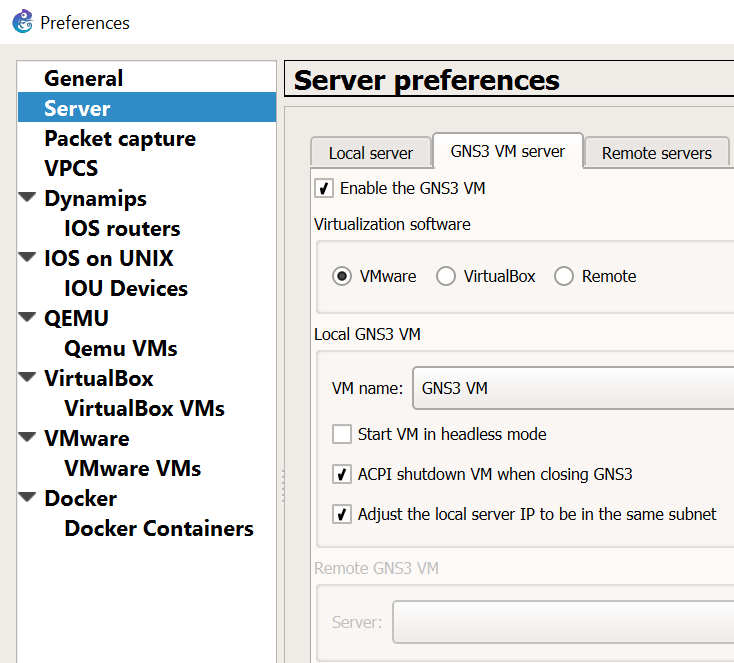
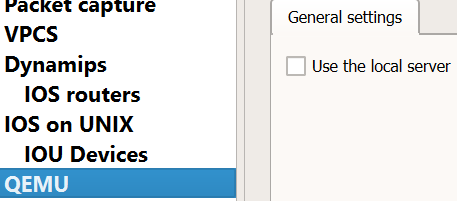
Disable “Use of the local server” for Dynamips and QEMU. We’ll use the GNS3 VM instead for running those processes.


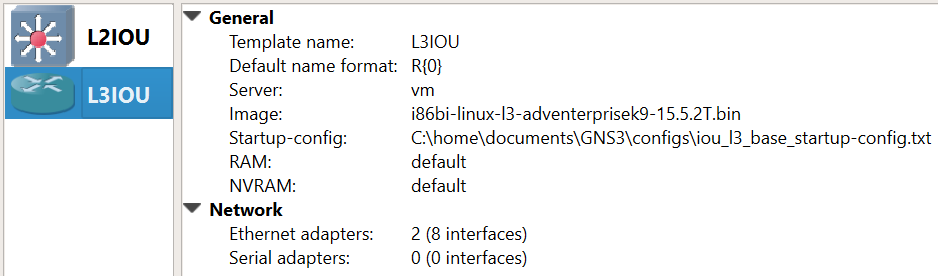
Create the L2/L3 IOU Devices:

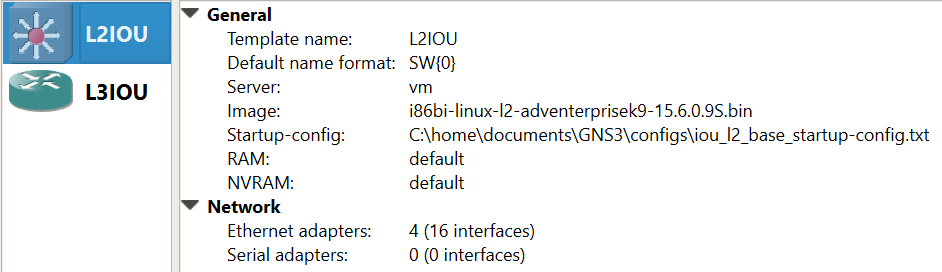

Add Device Image
New appliance template > Add and IOU > Run the IOU > New Image > Browse
i86bi-linux-l2-ipbasek9-15.1e.bin – IOU-L2
i86bi-linux-l3-adventerprisek9-15.4.2T.bin – IOU-L3
Operational Notes:
If you want to use SuperPutty as the SSH client for GNS3 click this link:
SuperPutty with GNS3
Yesterday I received my first ever fan mail. I am grateful the blog is proving useful to some, and as my content grows hopefully the usefulness of the blog also grows. If anyone want to send me mail or anything else I am open to that. I accept : IOU’s, Gift Cards, Cash, Precious Gems, Hugs, and IT equipment. In all honesty I am over the moon its helping someone.