Cisco Route : PPP

By default Cisco uses HDLC encapsulation on Serial interfaces. We are going to setup a simple PPP link with Authentication.

R1#show int serial 0/0   

Serial0/0 is up, line protocol is up

  Hardware is GT96K Serial

  Internet address is 10.1.1.1/24

  MTU 1500 bytes, BW 1544 Kbit/sec, DLY 20000 usec,

     reliability 255/255, txload 1/255, rxload 1/255

  Encapsulation HDLC, loopback not set

  Keepalive set (10 sec)

  Last input 00:00:09, output 00:00:07, output hang never

  Last clearing of "show interface" counters never

  Input queue: 0/75/0/0 (size/max/drops/flushes); Total output drops: 0

  Queueing strategy: weighted fair
R2#show int serial 0/0

Serial0/0 is up, line protocol is up

  Hardware is GT96K Serial

  Internet address is 10.1.1.2/24

  MTU 1500 bytes, BW 1544 Kbit/sec, DLY 20000 usec,

     reliability 255/255, txload 1/255, rxload 1/255

  Encapsulation HDLC, loopback not set

  Keepalive set (10 sec)

  Last input 00:00:05, output 00:00:06, output hang never

  Last clearing of "show interface" counters never

  Input queue: 0/75/0/0 (size/max/drops/flushes); Total output drops: 0

  Queueing strategy: weighted fair

We have to change that to PPP encapsulation on both sides, other wise there will be a encapsulation mismatch and the Interface will remain up but the line protocol will be down.

R1(config-if)#encapsulation ?

  frame-relay  Frame Relay networks

  hdlc         Serial HDLC synchronous

  lapb         LAPB (X.25 Level 2)

  ppp          Point-to-Point protocol

  smds         Switched Megabit Data Service (SMDS)

  x25          X.25
R1(config-if)#encapsulation ppp
R1(config-if)#

*Mar  1 00:05:27.739: %LINEPROTO-5-UPDOWN: Line protocol on Interface Serial0/0, changed state to down

R1(config-if)#exit                             

R1(config)#exit

R1#sh int serial 0/0

Serial0/0 is up, line protocol is down 

  Hardware is GT96K Serial

  Internet address is 10.1.1.1/24

  MTU 1500 bytes, BW 1544 Kbit/sec, DLY 20000 usec,

     reliability 255/255, txload 1/255, rxload 1/255

  Encapsulation PPP, LCP Listen, loopback not set
R2(config)#int serial 0/0

R2(config-if)#encapsulation ppp

R2(config-if)#exit

R2(config)#exit

R2#sh int serial 0/0

Serial0/0 is up, line protocol is up 

  Hardware is GT96K Serial

  Internet address is 10.1.1.2/24

  MTU 1500 bytes, BW 1544 Kbit/sec, DLY 20000 usec,

     reliability 255/255, txload 1/255, rxload 1/255

  Encapsulation PPP, LCP Open

We should move from HDLC to PPP because PPP has some features that HDLC doesn’t for example, Authentication options, error detection and error recovery features.

Password Authentication Protocol (PAP)  and  Challenge Authentication Protocol (CHAP)

PAP is very passive authentication, where as CHAP actively asks who are you?

PAP also sends username and password in Clear Text.

Here is how to configure CHAP on both routers

The username is the Hostname of the Peer Router you are authenticating to. The passwords must match.

R1(config)#username R2 password TPW

R1(config)#int serial 0/0

R1(config-if)#ppp authentication chap


R2(config)#username R1 password TPW

R2(config)#int serial 0/0

R2(config-if)#ppp authentication chap

Most likely if there is a issue its with the passwords mismatching, but you can always use the command:

R1#debug ppp authentication

Cisco Router : RIPng

RIP is a IPv4 Routing Protocol and RIPng is an extension of RIP developed to support IPv6. RIP and RIPng are known as Distance Vector Protocols. They use HOP counts as their metric for determining the best path. Here is some basic information for RIP and RIPng

FEATURE RIP RIPng
Advertised Routes IPv4 IPv6
Transport Protocol UDP 520 UDP 521
Multicast Address 224.0.0.9 FF02::9
VLSM Support Yes Yes
Metric Hop Count (Max 15) Hop Count (Max 15)
Administrative Distance 120 120
Routing Updates Every 30 Seconds and with each topology change Every 30 Seconds and with each topology change
Supports Authentication Yes Yes

RIPng is part of the CCNP Route exam, and even although I have not see it used in production, I have however heard of it being used in UNIX environments. It tends not to be used because it is super chatty, its not very scaleable and is based on the Bellman-Ford algorithms which is prone to routing loops and count to infinity issues.

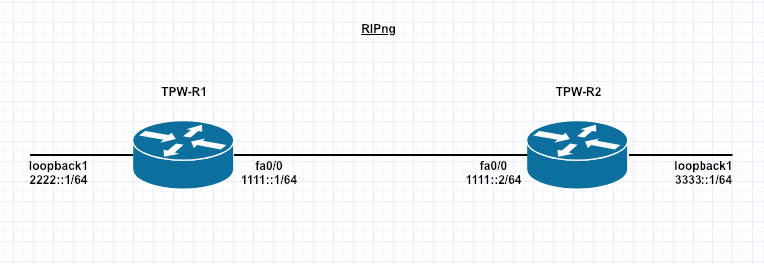
Here is an overview of the basic topology we will be using:

The Steps to configure RIPng:
1. Enable IPv6 Routing
2. Create RIPng Routing Process
3. Enable IPv6 on the interface
4. Enable RIPng on the interface

Here is the configuration steps to enabling RIPng on R1

TPW-R1# conf t
TPW-R1 (config)# ipv6 unicast routing
TPW-R1 (config)# ipv6 router rip TPW_RIP

Complete the steps on R2

TPW-R2# conf t
TPW-R2 (config)# ipv6 unicast routing
TPW-R2 (config)# ipv6 router rip TPW_RIP

You can see the RIPng Routing Protocol is running 

TPW-R1#show ipv6 protocols 
IPv6 Routing Protocol is "connected"
IPv6 Routing Protocol is "static"
IPv6 Routing Protocol is "rip TPW_RIP"
  Interfaces:
    None
TPW-R2#show ipv6 protocols 
IPv6 Routing Protocol is "connected"
IPv6 Routing Protocol is "static"
IPv6 Routing Protocol is "rip TPW_RIP"
  Interfaces:
    None

Although the you can see RIPng is not enabled on any interfaces.

To enable it on the interfaces complete the following commands

TPW-R1#conf t
TPW-R1(config)#int fa0/0
TPW-R1(config-if)#ipv6 rip TPW_RIP enable
TPW-R1(config-if)#int loopback 1        
TPW-R1(config-if)#ipv6 rip TPW_RIP enable

Complete on the 2nd Router

TPW-R2#conf t
TPW-R2(config)#int fa0/0
TPW-R2(config-if)#ipv6 rip TPW_RIP enable
TPW-R2(config-if)#int loopback 1        
TPW-R2(config-if)#ipv6 rip TPW_RIP enable

You can now see the interfaces are running RIPng

TPW-R1#show ipv6 protocols 
IPv6 Routing Protocol is "connected"
IPv6 Routing Protocol is "static"
IPv6 Routing Protocol is "rip TPW_RIP"
  Interfaces:
    Loopback1
    FastEthernet0/0

TPW-R2#show ipv6 protocols 
IPv6 Routing Protocol is "connected"
IPv6 Routing Protocol is "static"
IPv6 Routing Protocol is "rip TPW_RIP"
  Interfaces:
    Loopback1
    FastEthernet0/0

Verify all the routes are in the routing table

TPW-R1#show ipv6 route
IPv6 Routing Table - 7 entries
Codes:
C - Connected, L - Local, S - Static, R - RIP, B - BGP
U - Per-user Static route
I1 - ISIS L1, I2 - ISIS L2, IA - ISIS interarea, IS - ISIS summary
O - OSPF intra, OI - OSPF inter, OE1 - OSPF ext 1,OE2 - OSPF ext 2
ON1 - OSPF NSSA ext 1, ON2 - OSPF NSSA ext 2

C   1111::/64 [0/0]    
via ::, FastEthernet0/0
L   1111::1/128 [0/0]
via ::, FastEthernet0/0
C   2222::/64 [0/0]
     via ::, Loopback1
L   2222::1/128 [0/0]
     via ::, Loopback1
R   3333::/64 [120/2]
     via FE80::C602:52FF:FE37:0, FastEthernet0/0

Verify on the second Router

TPW-R2#show ipv6 route
IPv6 Routing Table - 7 entries

Codes:
C - Connected, L - Local, S - Static, R - RIP, B - BGP
U - Per-user Static route
I1 - ISIS L1, I2 - ISIS L2, IA - ISIS interarea, IS - ISIS summary
O - OSPF intra, OI - OSPF inter, OE1 - OSPF ext 1, OE2 - OSPF ext 2
ON1 - OSPF NSSA ext 1, ON2 - OSPF NSSA ext 2

C   1111::/64 [0/0]
     via ::, FastEthernet0/0
L   1111::2/128 [0/0]
     via ::, FastEthernet0/0
R   2222::/64 [120/2]
     via FE80::C601:52FF:FE34:0, FastEthernet0/0
C   3333::/64 [0/0]
     via ::, Loopback1
L   3333::1/128 [0/0]
     via ::, Loopback1

We need to verify connectivity TPW-R1

TPW-R1#ping ipv6 1111::1
Type escape sequence to abort.
Sending 5, 100-byte ICMP Echos to 1111::1, timeout is 2 seconds:
!!!!!
Success rate is 100 percent (5/5), round-trip min/avg/max = 0/0/4 ms

TPW-R1#ping ipv6 1111::2
Type escape sequence to abort.
Sending 5, 100-byte ICMP Echos to 1111::2, timeout is 2 seconds:
!!!!!
Success rate is 100 percent (5/5), round-trip min/avg/max = 28/28/28 ms

TPW-R1#ping ipv6 2222::1
Type escape sequence to abort.
Sending 5, 100-byte ICMP Echos to 2222::1, timeout is 2 seconds:
!!!!!
Success rate is 100 percent (5/5), round-trip min/avg/max = 0/2/4 ms

TPW-R1#ping ipv6 3333::1
Type escape sequence to abort.
Sending 5, 100-byte ICMP Echos to 3333::1, timeout is 2 seconds:
!!!!!

Finally, We need to verify connectivity TPW-R2

TPW-R2#ping ipv6 1111::1
Type escape sequence to abort.
Sending 5, 100-byte ICMP Echos to 1111::1, timeout is 2 seconds:
!!!!!
Success rate is 100 percent (5/5), round-trip min/avg/max = 0/0/4 ms

TPW-R2#ping ipv6 1111::2
Type escape sequence to abort.
Sending 5, 100-byte ICMP Echos to 1111::2, timeout is 2 seconds:
!!!!!
Success rate is 100 percent (5/5), round-trip min/avg/max = 28/28/28 ms

TPW-R2#ping ipv6 2222::1
Type escape sequence to abort.
Sending 5, 100-byte ICMP Echos to 2222::1, timeout is 2 seconds:
!!!!!
Success rate is 100 percent (5/5), round-trip min/avg/max = 0/2/4 ms

TPW-R2#ping ipv6 3333::1
Type escape sequence to abort.
Sending 5, 100-byte ICMP Echos to 3333::1, timeout is 2 seconds:
!!!!!
Success rate is 100 percent (5/5), round-trip min/avg/max = 8/23/28 ms

RIPng is fully configured and working.

Note that using FE80::1 link-local and FE80:2 link-local – for point to point its a lot easier to ping – unique link local on every router and interface, I just wanted to make it a bit easier to see by using 1111::1 and 2, 2222 and 3333

The Packet Wizard : Today I begin the CCNP R&S


Notice: Trying to access array offset on value of type null in /home/minted6/thepacketwizard.com/wp-content/plugins/amazon-associates-link-builder/vendor/mustache/mustache/src/Mustache/Parser.php on line 278

Today, I officially start the CCNP Route Switch Course.

I have purchased the following book set, I have provided a link if you wish to purchase them:

I am also using Chris Bryant’s Video Udemy Course (Who helped me pass the CCNA R&S and Security, very thorough video series) and I will try and get his books. I have provided a link if you wish to purchase them :

https://www.udemy.com/ccnpallinone/

I plan to have passed the CCNP Switch by July, because I have some pretty big work trips coming up and I know that is going to get in the way a little. However the 18hr flight to Singapore, I should be able to get through a power of reading and labs 🙂

I will start to blog on my progress and things I am learning.

Wish me Luck!

Cisco : Enable SSH on Cisco Switch, Router and ASA

When you configure a Cisco device, you need to use a console cable and connect directly to the system to access it. Follow the SSH setup below, will enable SSH access to your Cisco devices, since SSH is not enabled by default. Once you enable SSH, you can then access it remotely using SecureCRT or any other SSH client.

Set hostname and domain-name

The hostname has to have a hostname and domain-name.

switch# config t
switch(config)# hostname tpw-switch
tpw-switch(config)# ip domain-name thepacketwizard.com

Setup Management IP

In the following example, the management ip address will be set to 10.100.101.2 in the 101 VLAN. The default gateway points to the firewall, which is 10.100.101.1

tpw-switch# ip default-gateway 10.100.101.1
tpw-switch# interface vlan 101
tpw-switch(config-if)# ip address 10.100.101.2 255.255.255.0

Generate the RSA Keys

The switch or router should have RSA keys that it will use during the SSH process. So, generate these using crypto command as shown below.

tpw-switch(config)# crypto key generate rsa
  The name for the keys will be: tpw-switch.thepacketwizard.com
  Choose the size of the key modulus in the range of 360 to 2048 for your
    General Purpose Keys. Choosing a key modulus greater than 512 may take
    a few minutes.

How many bits in the modulus [512]: 1024
  % Generating 1024 bit RSA keys, keys will be non-exportable...[OK]

Setup the Line VTY configurations

Setup the following line vty configuration, where input transport is set to SSH only. Set the login to local, and password to 7, and make sure Telnet is not enabled:

tpw-switch# line vty 0 4
 tpw-switch(config-line)# transport input ssh
 tpw-switch(config-line)# login local
 tpw-switch(config-line)# password 7
 tpw-switch(config-line)# exit

If you have not set the console line yet, use the following:

tpw-switch# line console 0
tpw-switch(config-line)# logging synchronous
tpw-switch(config-line)# login local

Create the username password

If you don’t have an username created already, here is how:

tpw-switch# config t
Enter configuration commands, one per line.  End with CNTL/Z.
tpw-switch(config)# username thepacketwizard password tpwpassword123
tpw-switch# enable secret tpwenablepassword

Make sure the password-encryption service is turned-on, which will encrypt the password, and when you do “show run”, you’ll see only the encrypted password and not clear-text password.

tpw-switch# service password-encryption

Verify SSH access

From the switch, if you do ‘show ip ssh’, it will confirm that the SSH is enabled on this Cisco device.

tpw-switch# show ip ssh
 SSH Enabled - version 1.99
 Authentication timeout: 120 secs; Authentication retries: 3

After the above configurations, login from a remote machine to verify that you can ssh to this cisco switch.

In the example, 10.100.101.2 is the management ip-address of the switch.

TPW-Remote-Computer# ssh 10.100.101.2
 login as: thepacketwizard
 Using keyboard-interactive authentication.
 Password:

tpw-switch>en
 Password:
 tpw-switch#

You are now setup and logged in on SSH!

To read more on SSH visit: https://en.wikipedia.org/wiki/Secure_Shell

Data Centre : Post DC Move Unracking

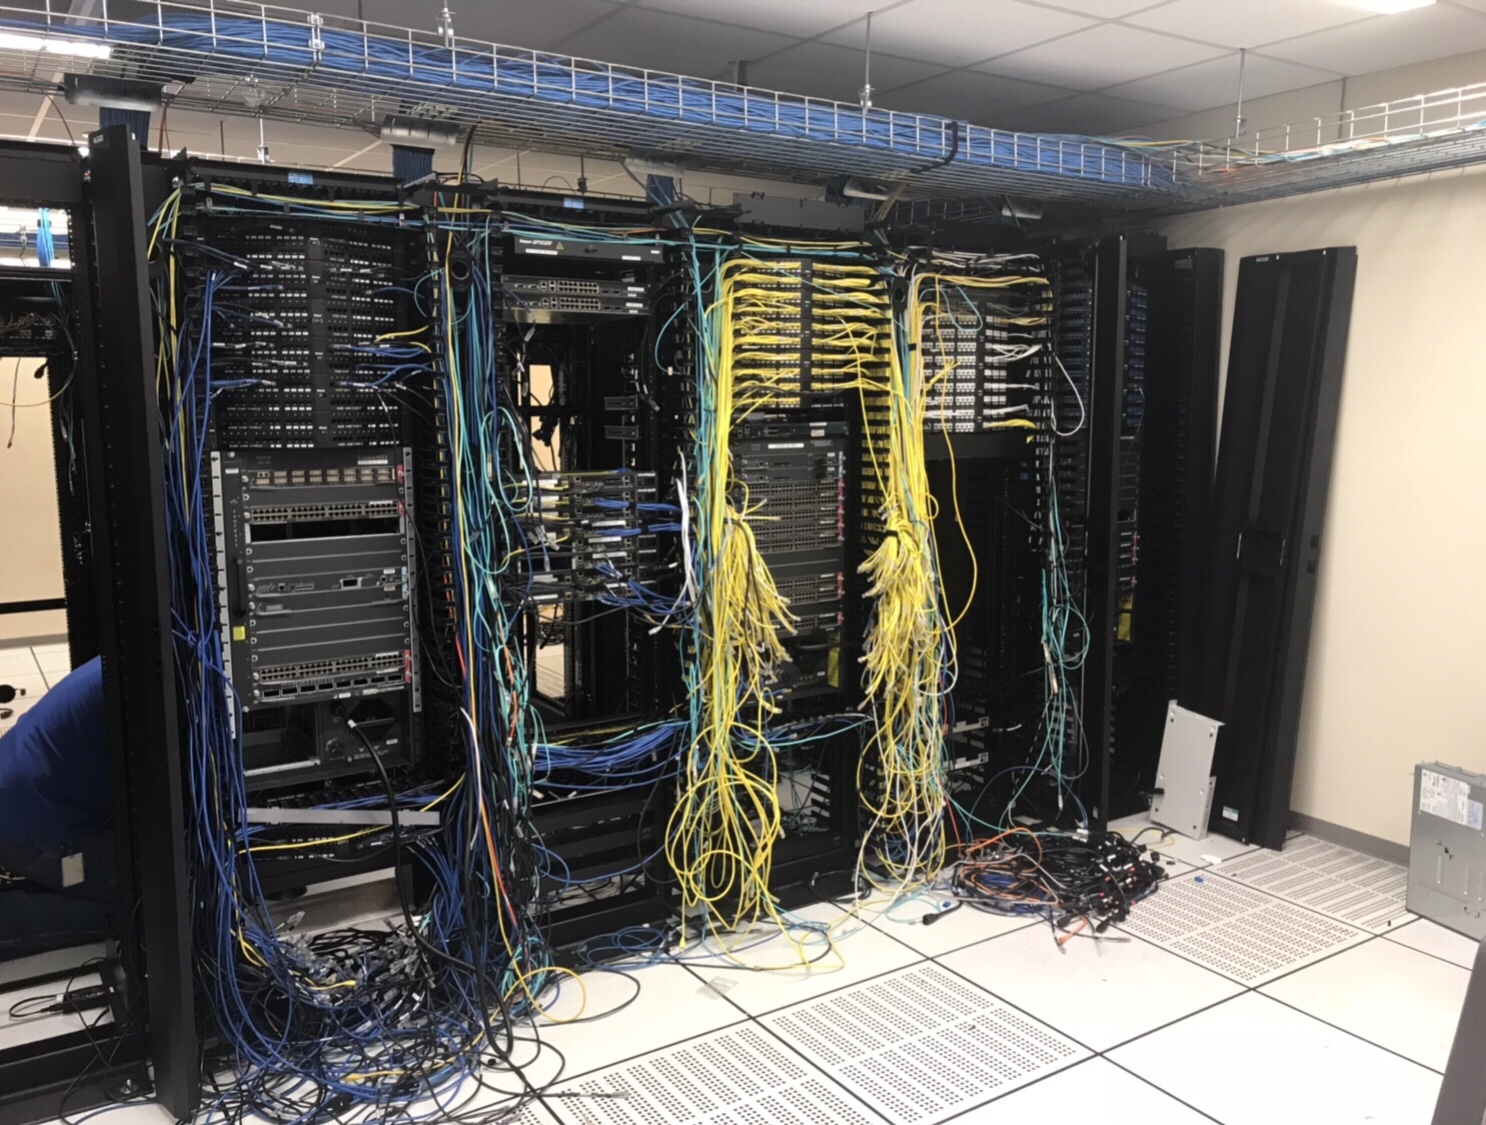
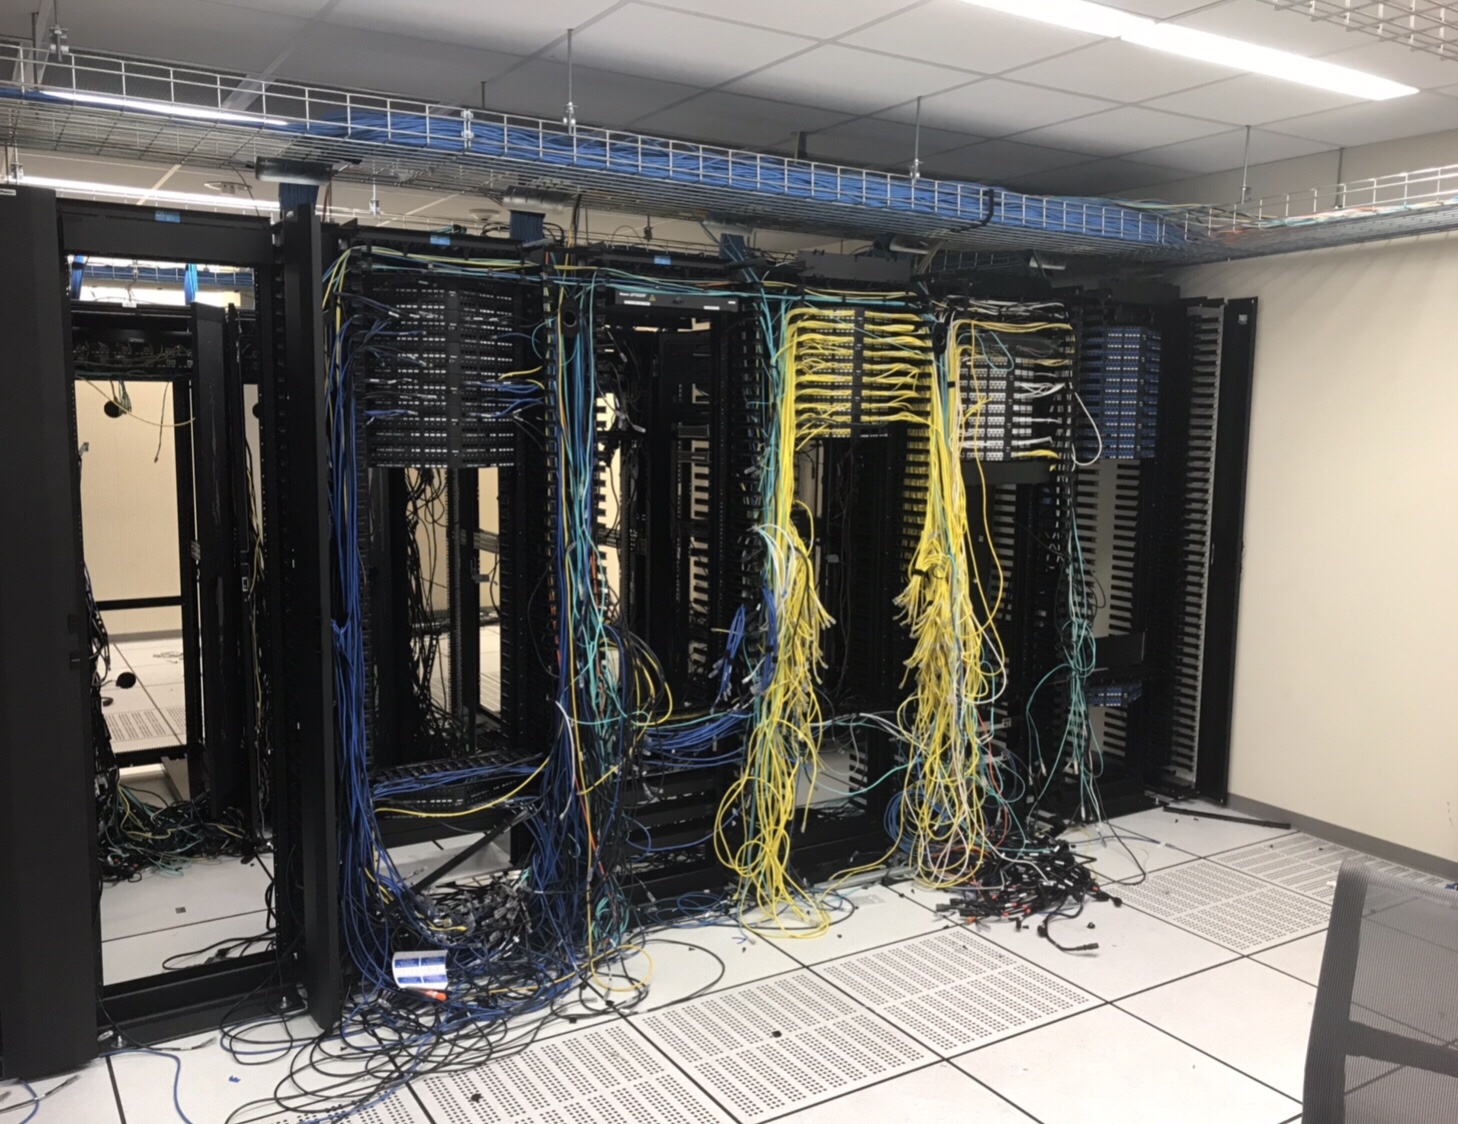
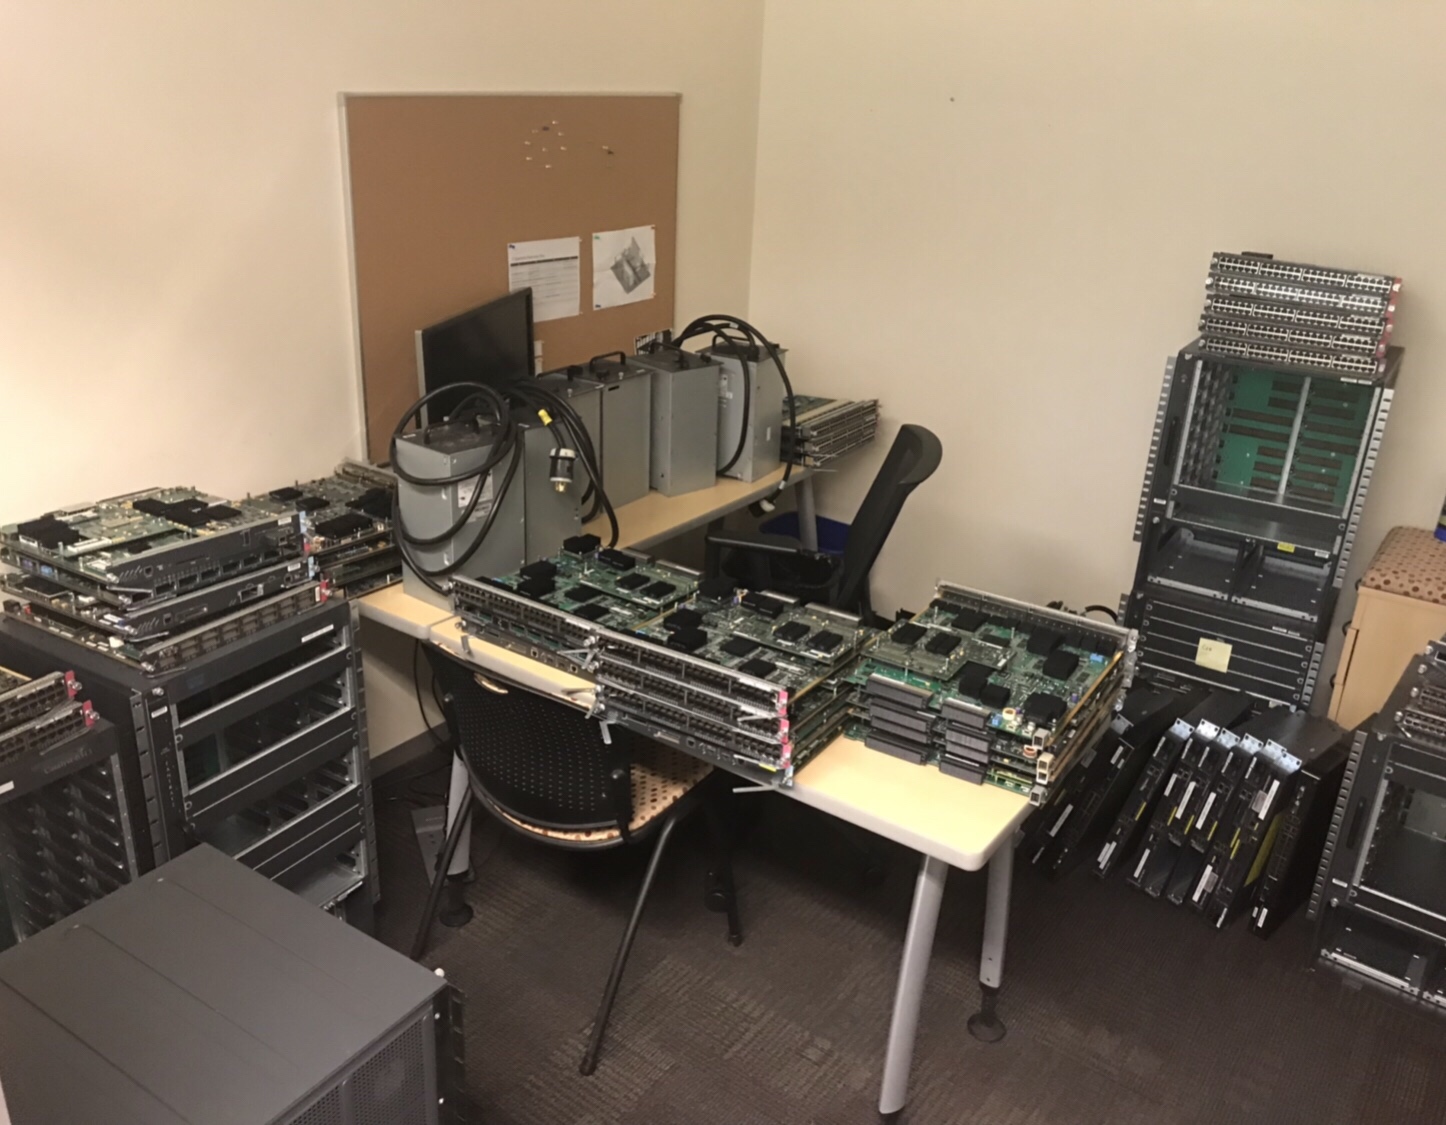
We moved our company internal Data Centre to a COLO Facility 2 weeks ago, here is what is left. Before and After Pictures, as well as a photo of the “Boneyard”. A pretty good haul for E-Wasting:

2x Cisco 6909’s

3x Cisco 6513’s

8x Cisco ASA’s

2x Brocade Loadbalancers

4x Cisco 2900 Routers

2x Cisco Nexus 5k

1x Cisco Wireless LAN Controller


Cisco : Serial Numbers

Today I have spent some time trying to find serial numbers on multiple Cisco devices, some Routers, Switches, Firewalls and Wireless LAN Controllers. Here is 7 ways I have found:

  1. Locate the serial number tag on the device chassis.
  2. The serial number is displayed in the banner during boot.
  3. “show version” command. (Look for Processor board ID or S/N)
  4. “show inventory” command. (Look for Hw Serial# or SN:)(Also works on WLC’s)
  5. “show diag” command. (Look for Chassis Serial Number)
  6. “show hardware” command. (Look for Processor board ID or S/N)
  7. “show tech-support” command.