Cisco Route : PPP

By default Cisco uses HDLC encapsulation on Serial interfaces. We are going to setup a simple PPP link with Authentication.

R1#show int serial 0/0   

Serial0/0 is up, line protocol is up

  Hardware is GT96K Serial

  Internet address is 10.1.1.1/24

  MTU 1500 bytes, BW 1544 Kbit/sec, DLY 20000 usec,

     reliability 255/255, txload 1/255, rxload 1/255

  Encapsulation HDLC, loopback not set

  Keepalive set (10 sec)

  Last input 00:00:09, output 00:00:07, output hang never

  Last clearing of "show interface" counters never

  Input queue: 0/75/0/0 (size/max/drops/flushes); Total output drops: 0

  Queueing strategy: weighted fair
R2#show int serial 0/0

Serial0/0 is up, line protocol is up

  Hardware is GT96K Serial

  Internet address is 10.1.1.2/24

  MTU 1500 bytes, BW 1544 Kbit/sec, DLY 20000 usec,

     reliability 255/255, txload 1/255, rxload 1/255

  Encapsulation HDLC, loopback not set

  Keepalive set (10 sec)

  Last input 00:00:05, output 00:00:06, output hang never

  Last clearing of "show interface" counters never

  Input queue: 0/75/0/0 (size/max/drops/flushes); Total output drops: 0

  Queueing strategy: weighted fair

We have to change that to PPP encapsulation on both sides, other wise there will be a encapsulation mismatch and the Interface will remain up but the line protocol will be down.

R1(config-if)#encapsulation ?

  frame-relay  Frame Relay networks

  hdlc         Serial HDLC synchronous

  lapb         LAPB (X.25 Level 2)

  ppp          Point-to-Point protocol

  smds         Switched Megabit Data Service (SMDS)

  x25          X.25
R1(config-if)#encapsulation ppp
R1(config-if)#

*Mar  1 00:05:27.739: %LINEPROTO-5-UPDOWN: Line protocol on Interface Serial0/0, changed state to down

R1(config-if)#exit                             

R1(config)#exit

R1#sh int serial 0/0

Serial0/0 is up, line protocol is down 

  Hardware is GT96K Serial

  Internet address is 10.1.1.1/24

  MTU 1500 bytes, BW 1544 Kbit/sec, DLY 20000 usec,

     reliability 255/255, txload 1/255, rxload 1/255

  Encapsulation PPP, LCP Listen, loopback not set
R2(config)#int serial 0/0

R2(config-if)#encapsulation ppp

R2(config-if)#exit

R2(config)#exit

R2#sh int serial 0/0

Serial0/0 is up, line protocol is up 

  Hardware is GT96K Serial

  Internet address is 10.1.1.2/24

  MTU 1500 bytes, BW 1544 Kbit/sec, DLY 20000 usec,

     reliability 255/255, txload 1/255, rxload 1/255

  Encapsulation PPP, LCP Open

We should move from HDLC to PPP because PPP has some features that HDLC doesn’t for example, Authentication options, error detection and error recovery features.

Password Authentication Protocol (PAP)  and  Challenge Authentication Protocol (CHAP)

PAP is very passive authentication, where as CHAP actively asks who are you?

PAP also sends username and password in Clear Text.

Here is how to configure CHAP on both routers

The username is the Hostname of the Peer Router you are authenticating to. The passwords must match.

R1(config)#username R2 password TPW

R1(config)#int serial 0/0

R1(config-if)#ppp authentication chap


R2(config)#username R1 password TPW

R2(config)#int serial 0/0

R2(config-if)#ppp authentication chap

Most likely if there is a issue its with the passwords mismatching, but you can always use the command:

R1#debug ppp authentication

Ruckus : Using Multiple RADIUS Servers

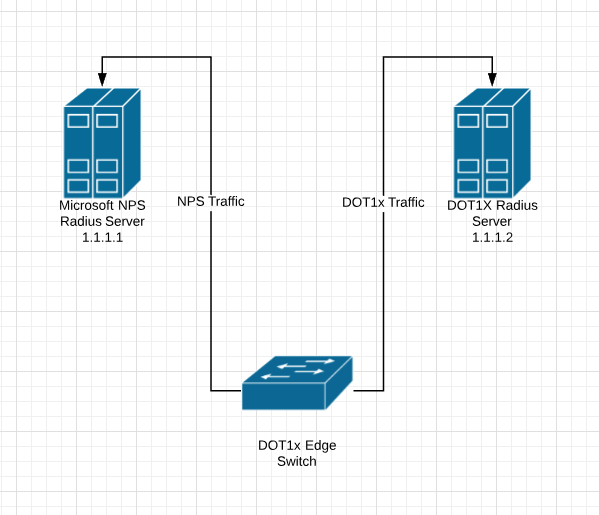
I have recently been configuring Network Access Control with 802.1x, and I had been having issues with using multiple RADIUS servers on Ruckus ICX Switches. The main issue being:

RADIUS Authenticate over SSH to switch using Microsoft NPS RADIUS Server
RADIUS Authenticate using 802.1x or MAC-Auth using DOT1x RADIUS Server

In Ruckus ICX switches there isn’t any concept of AAA groups like in Cisco, where you can designate specific RADIUS traffic to go to various different RADIUS Servers.

I have found 2 work arounds, I did however also call support and spend 1 hour troubleshooting with them and they didn’t have an answer for me.

Some Basic Setup Information

Microsoft NPS RADIUS Server : 1.1.1.1
DOT1x RADIUS Server : 1.1.1.2

Here are my AAA Authentication Commands:

SSH@tpw-sw1# sh run | inc authentication
aaa authentication web-server default radius local
aaa authentication enable default radius local
aaa authentication dot1x default radius
aaa authentication login default radius local

Here are my 2 work arounds:

WORKAROUND 1

SSH@tpw-sw1(config)# radius-server host 1.1.1.1 auth-port 1812 acct-port 1813 default key RADIUS1SECRET
SSH@tpw-sw1(config)# radius-server host 1.1.1.2 auth-port 1812 acct-port 1813 default key RADIUS2SECRET dot1x mac-auth

If you use the 1.1.1.2 RADIUS server first in the list you cannot authenticate to the switch at all, even over super-user-password. So the only way I have it working is to have the DOT1x Radius Server listed 2nd but calling out DOT1x and MAC-AUTH.

WORKAROUND 2

The other method I found is to apply a command at the interface level:

SSH@tpw-sw1# conf t
SSH@tpw-sw1(config)# int ethernet 1/1/1
SSH@tandy-lab-sw1(config-if-e1000-1/1/1)#use-radius-server 1.1.1.2

I hope that this helps, I spent a day trying to figure it out 🙂


The Packet Wizard : Migrating from Cisco 6500 to Ruckus ICX

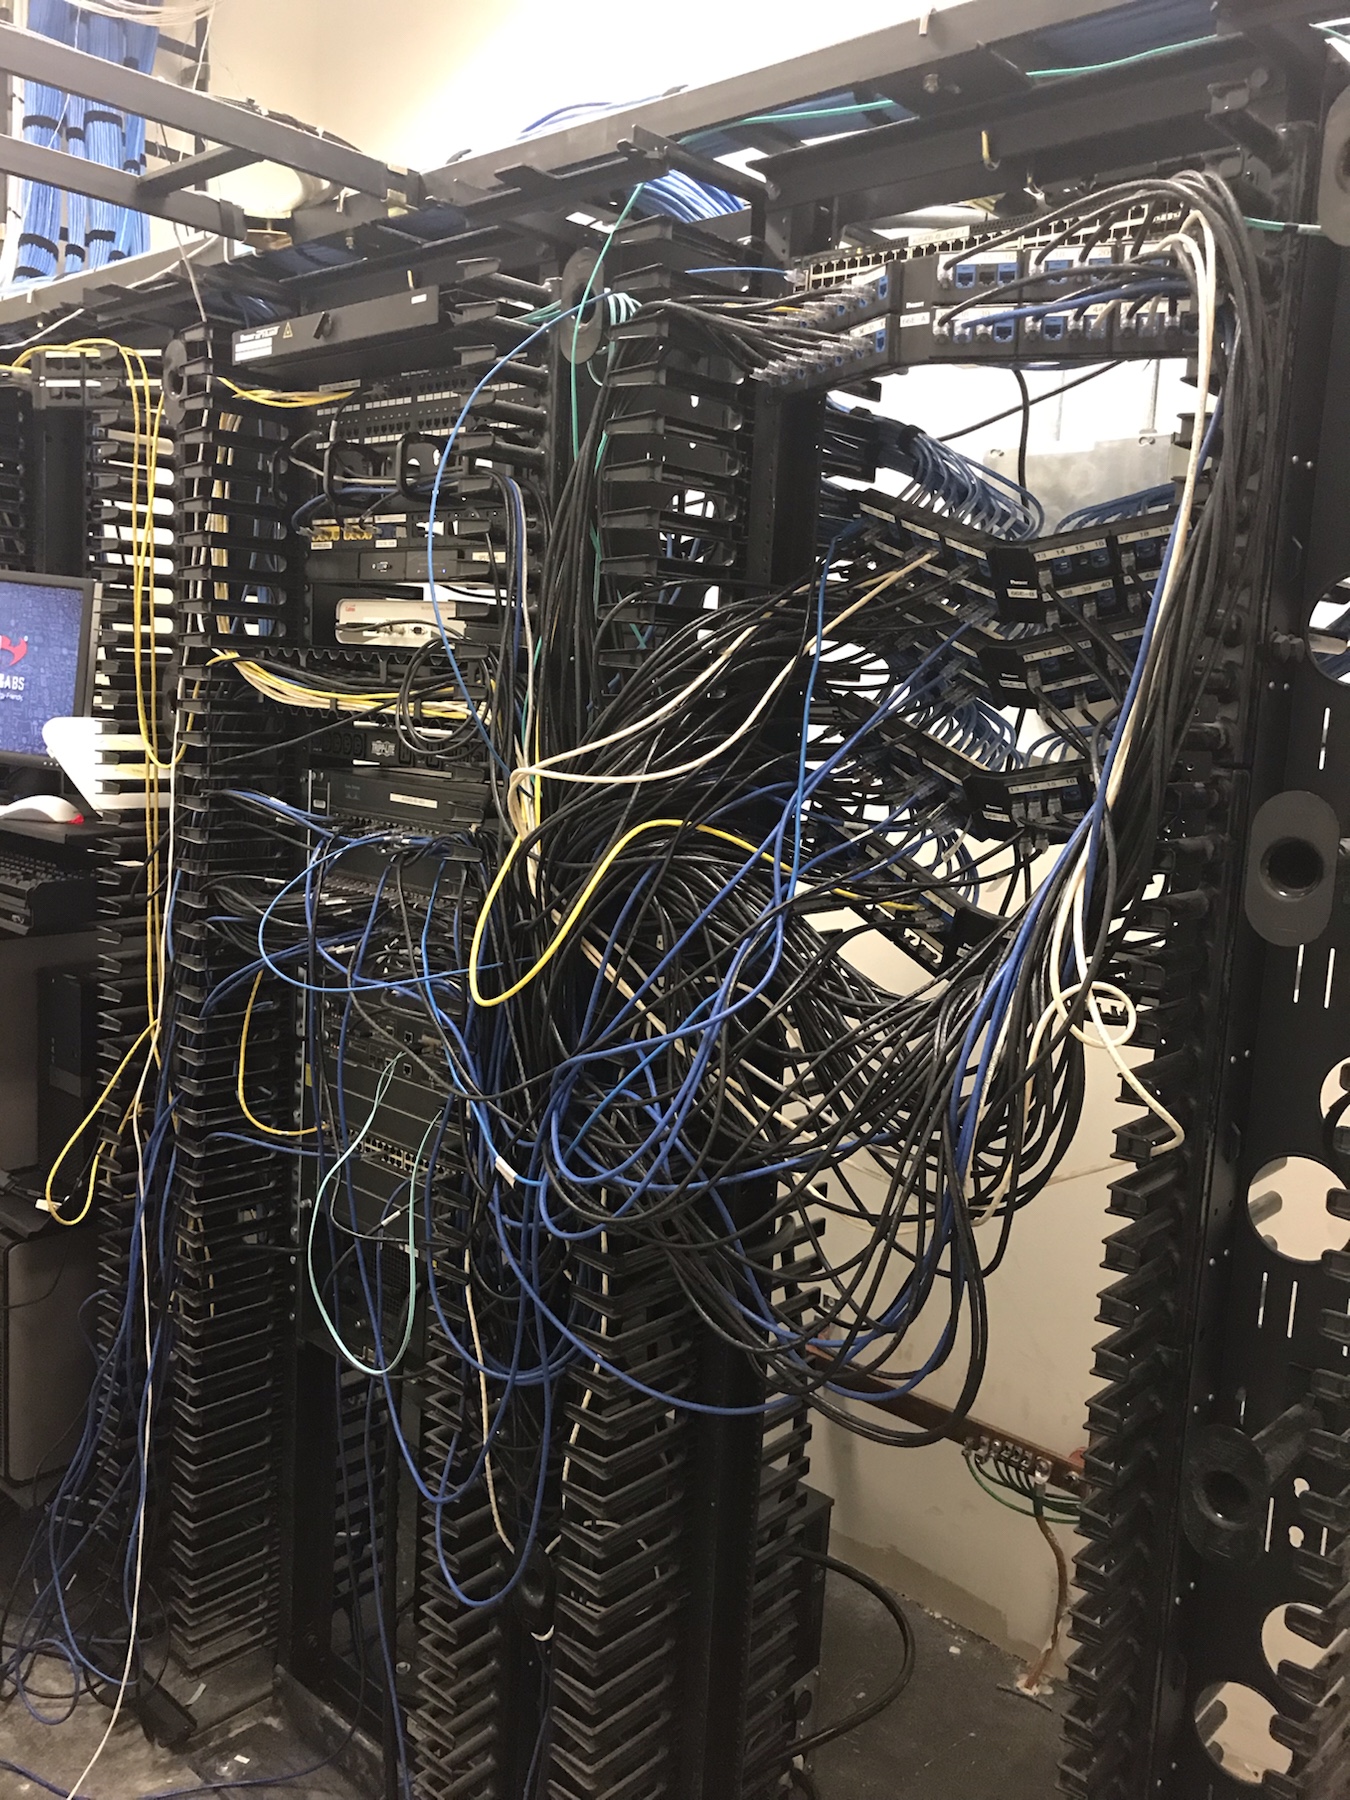
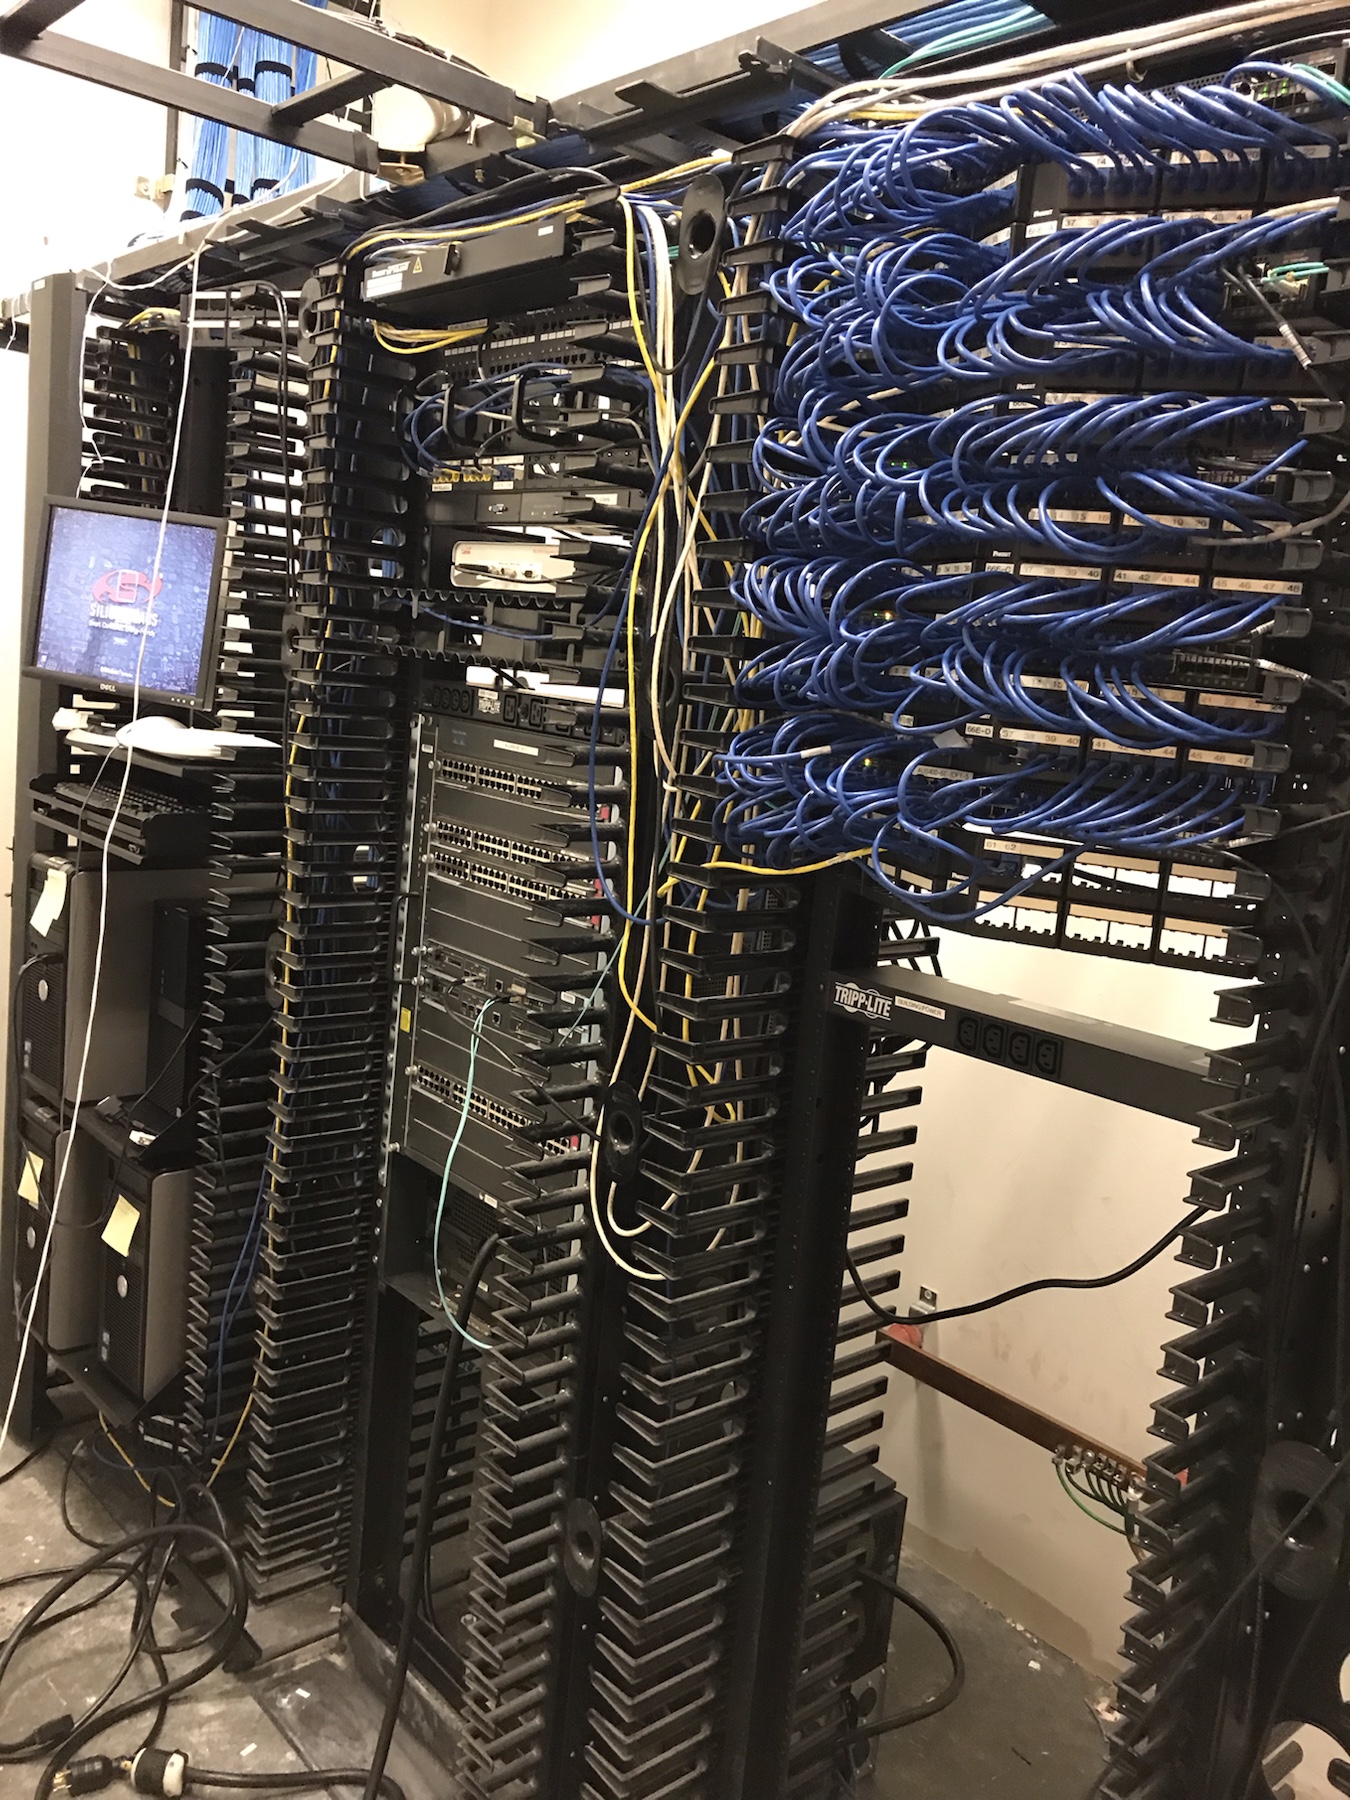
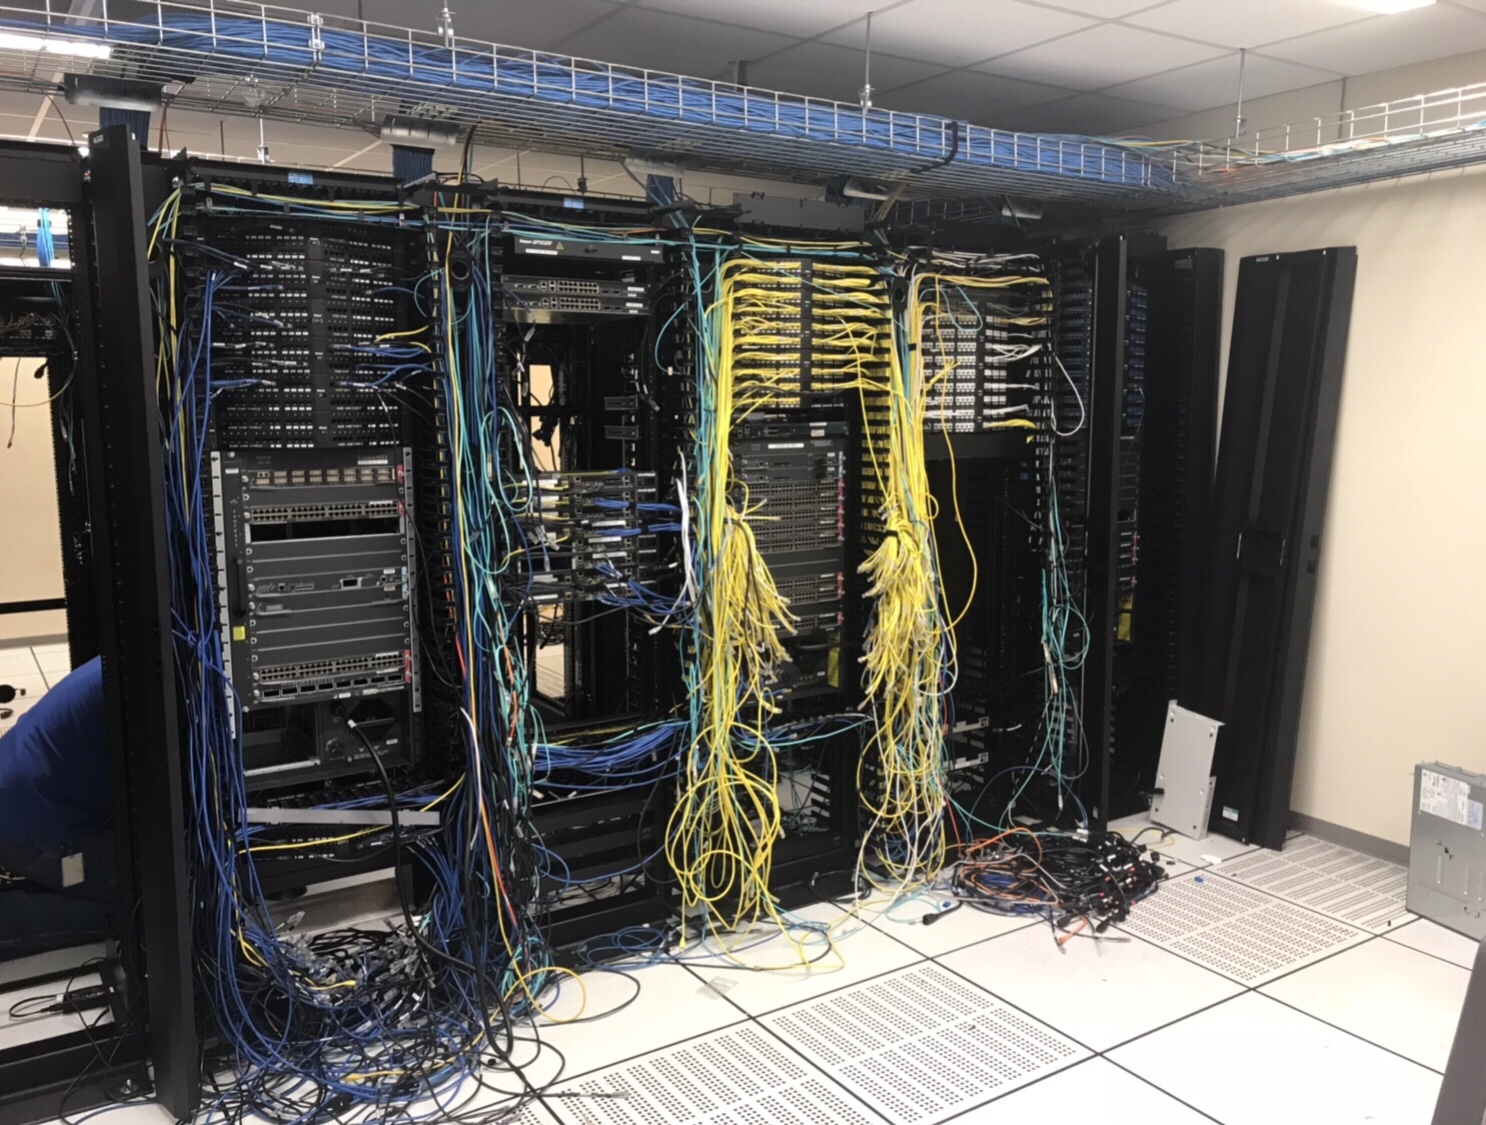
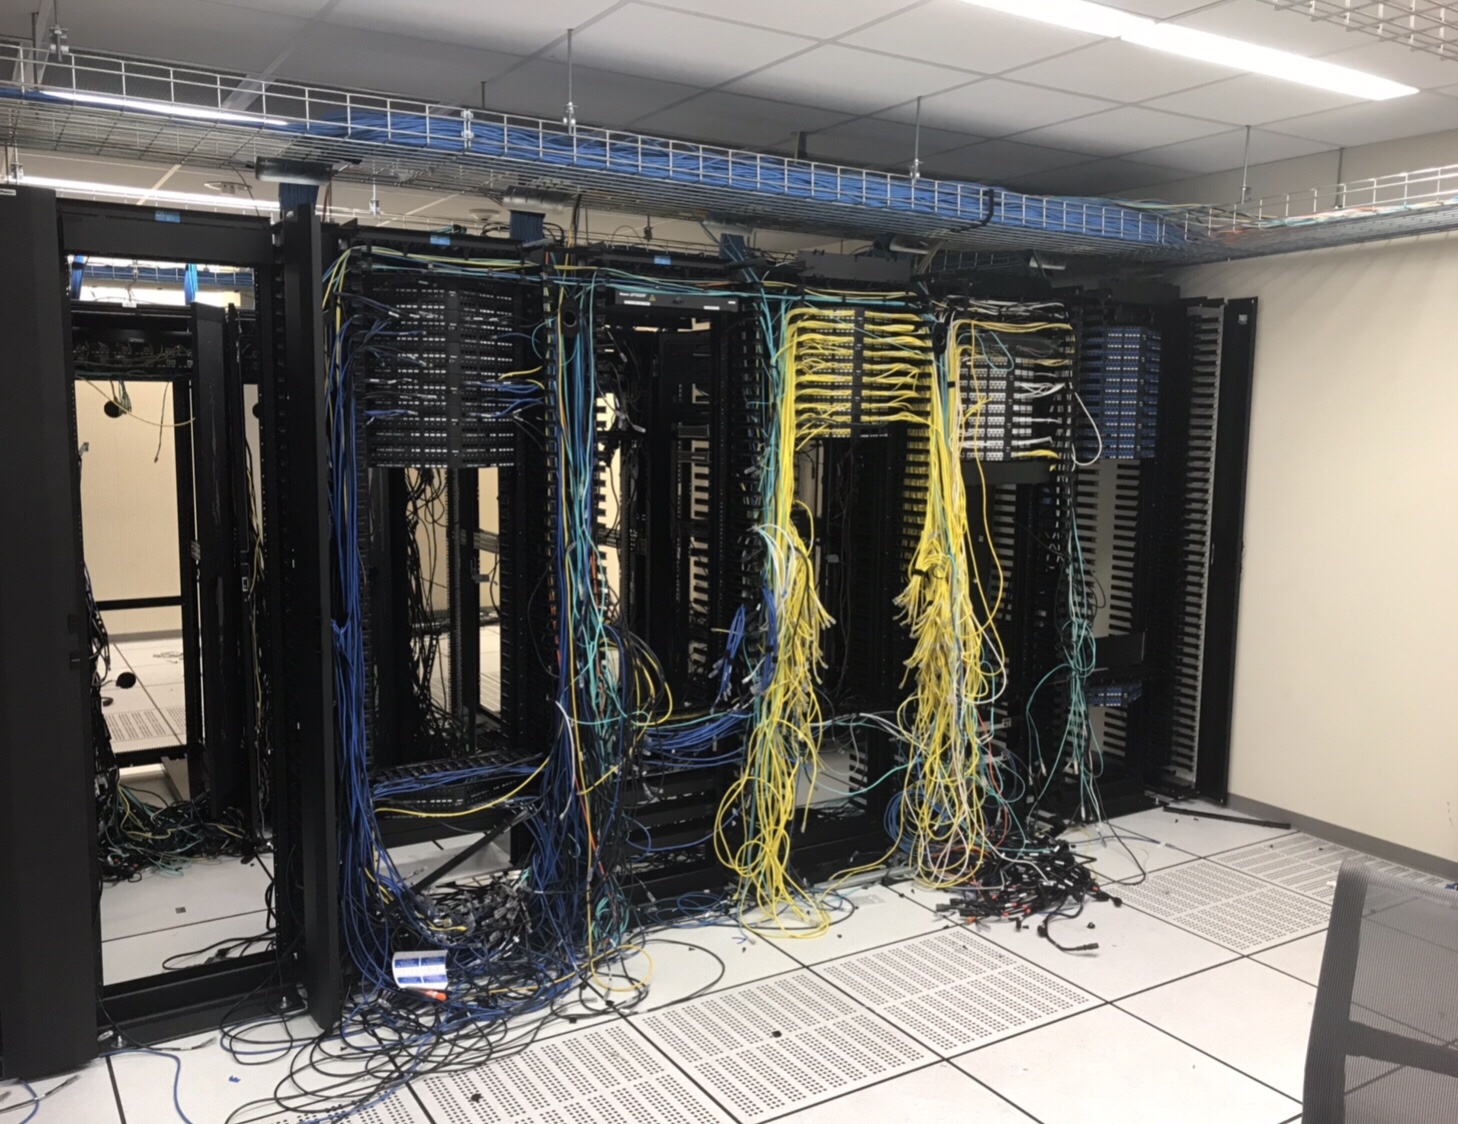
Just a quick post this week, I have been busy migrating from Cisco 6500 to Ruckus ICX. Here are some before and after photos and a video of the all important turn off. The main thing I learned in this migration is to chose your ports that are different, do Trunk Ports, Wireless, Printers, anything that is unique or requires a slightly different configuration do them first, then the regular desktop/user ports are just easy swaps.

The before picture we had already started to move the patch panels.

Listen to that power noise drop when it turns off. Turning off Cisco 6500 after Migration

Cisco : Port Security

Is this frame from a trusted Source? That is the question!

As I continue my CCNP studies, I near the end of the CCNP Switch Course, this is a topic that was covered in the CCNA, and I haven’t really touched it since, so here is a refresher.

A port enabled with port security will expect to see frames sourced from a particular MAC address or group of MAC addresses, if the switch receives a frame from a MAC address it does not have listed the port takes action according to the violation mode that is set. The violation mode by default is to shutdown the port.

Enable Port Security

*You can only enable port security on a edge port, so that means that port can never become a trunk port*

tpw-sw1(conf)# int gi0/1
tpw-sw1(config-int)#switchport mode access
tpw-sw1(config-int)#switchport access vlan 10
tpw-sw1(config-int)#switchport port-security

Confirm it is working and information gathering

tpw-sw1# show port-security
tpw-sw1# show port-security address
tpw-sw1# show port-security interface gi0/1

More Port Security options

tpw-sw1(conf)# int gi0/1
tpw-sw1(config-int) switchport port-security ?
          aging - Port-security aging commands
          mac-address  - Secure mac address
          maximum - Max secure addresses
          violation - Security violation mode
tpw-sw1(config-int) switchport port-security maximum <1-6144>
tpw-sw1(config-int) switchport port-security violation ?
          protect - Security violation protect mode (drops the offending frames )
          restrict - Security violation restrict mode (drops, creates log messages, but port remains active )
          shutdown - Security violation shutdown mode (default will put the port into err-disabled (fix problem first and shut, no shut))
tpw-sw1(config-int) switchport port-security mac-address ?
         H.H.H - 48 bit mac address
         sticky - Configure dynamic secure addresses as sticky (dynamic addresses but kept on switch reload )
tpw-sw1(config-int) switchport port-security aging ?
         time Port-security aging time
         type Port-security aging type

This is just the very basics of Port Security, there is similar implementations on all switches I have worked with.

Palo Alto : Upgrade High Availability (HA) Pair

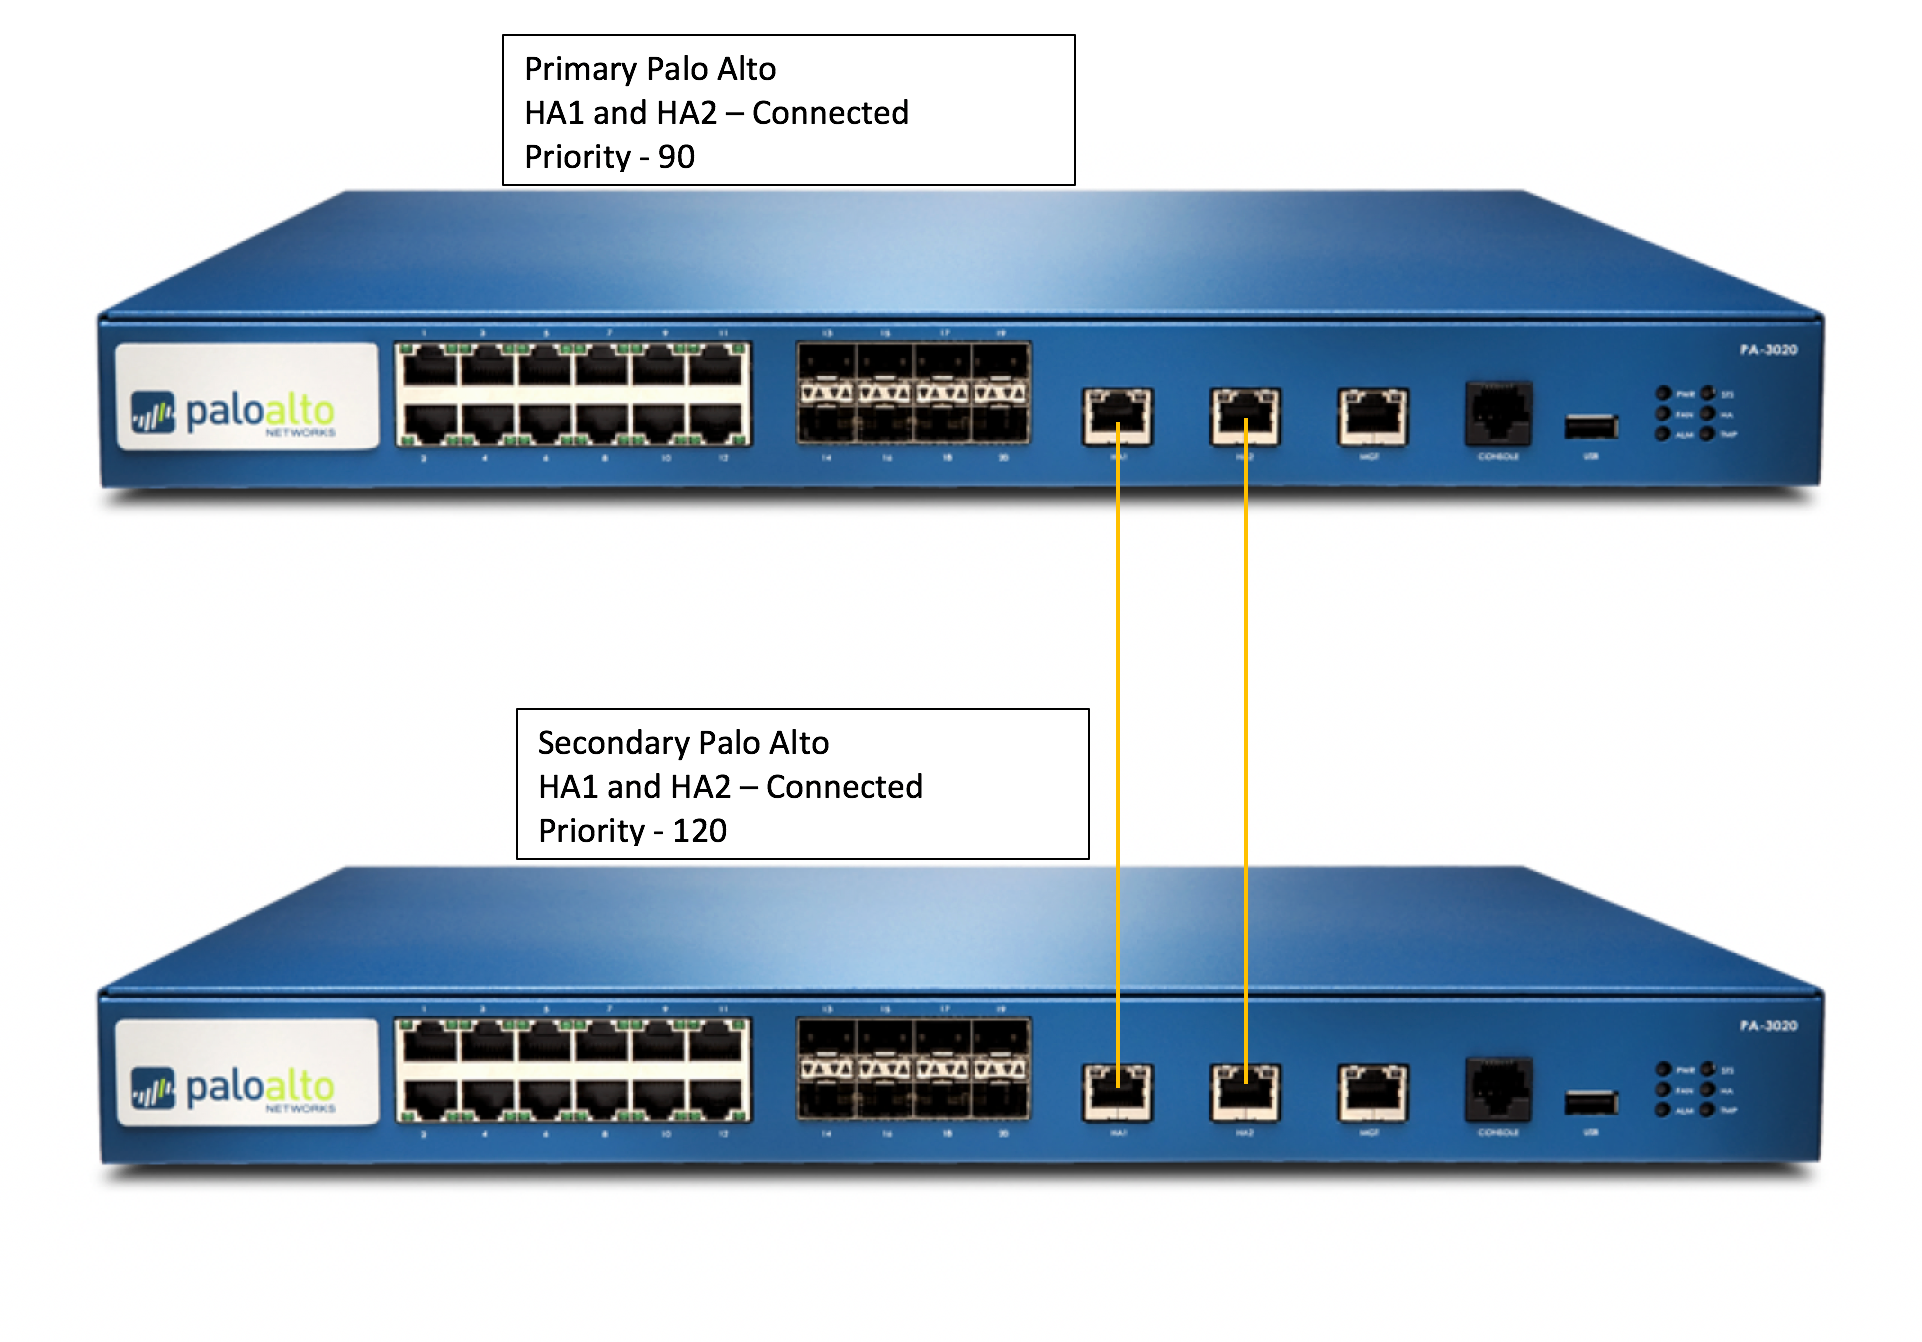
Over the last 3 weeks since the Christmas and New Year Holidays,  I have been upgrading all of our firewalls globally, many of them are an High Availability Pair. This means they are redundant and being redundant allows me to upgrade them individually while the site stays full up and functional.

The  instructions for upgrading an HA pair are recommended because:

      • It verifies HA functionality before starting the upgrade.
      • It ensures the upgrade is successfully applied to the first device before starting the upgrade on the second.
      • At any point in the procedure, if any issue arises, the upgrade can be seamlessly reverted without any expected downtime (unless you are having any dynamic routing protocols line OSPF/BGP).
      • When finished, the final active/passive device state will be the same as it was before the upgrade with the fewest number of fail overs possible (2).

Before you Begin :

Take backup of the configuration as well as Tech Support from both HA Peers. Give proper names to each file, here is how:

Device > Setup > Operations > Save Named Configuration Snapshot

Device > Setup > Operations > Export Named configuration Snapshot

Device > Setup > Operations > Export Device State (If device managed from panorama

Device > Support > Generate Tech Support File, and then download it. (Might be required if any issues)

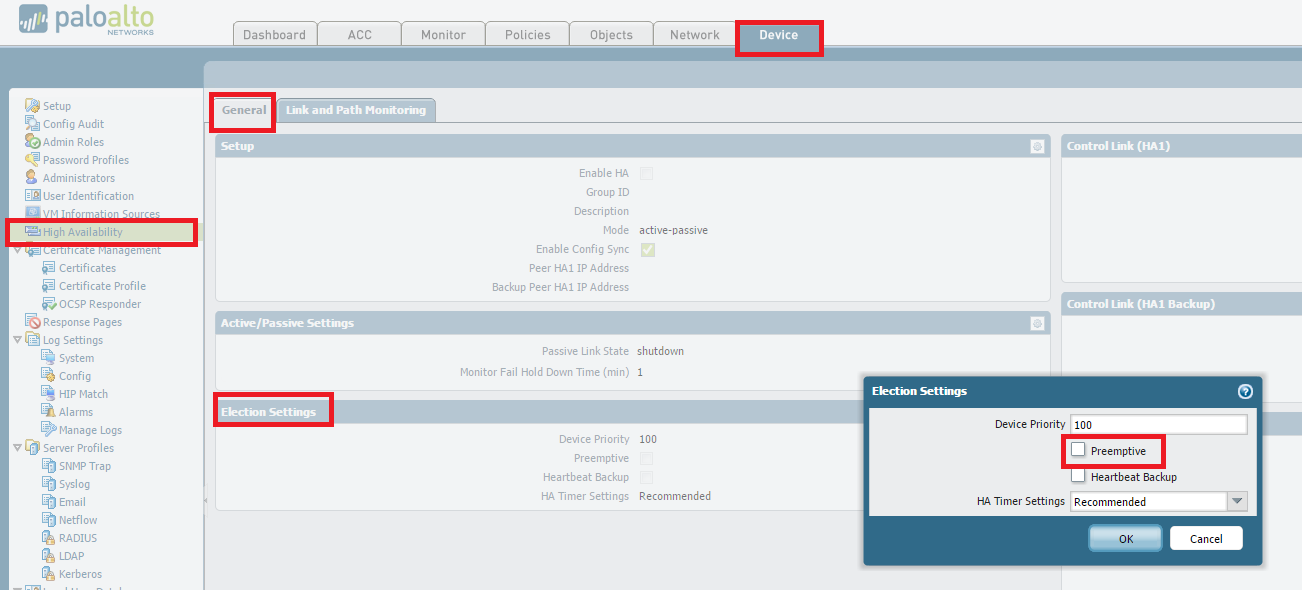
(Optional but recommended) Disable preemption on High Availability settings to avoid the possibility of unwanted failovers. Disabling preempt configuration change must be committed on both peers. Likewise, once completed, re-enabling must be committed on both peers.

To disable preempt, go to

Device > High Availability > Election Settings and uncheck Preemptive.
Then, perform a commit.


If upgrade is between major versions (4.1 -> 5.0 OR 5.0-> 6.0), it is advisable to disable TCP-Reject-Non-SYN, so that sessions can failover even when they are not in sync. : Do this on both Firewalls from the CLI:

 # set deviceconfig setting session tcp-reject-non-syn no
 # commit


(Optional but recommended) Arrange for Out-of-Band access (Console access) to the firewall if possible. This is again to help recover from any unexpected situation where we are unable to login to the firewall. If you have a Terminal Server awesome, if not a simple Cell Phone tethered to a Laptop with RDP is also fine.


The Upgrade Process

Suspend Backup Device 

From the CLI

 > request high-availability state suspend

From the GUI

Go to Device > High Availability > Operational Commands  > Suspend local device

Install the new PAN-OS on the suspended device

Device > Software > Install

Reboot the device to complete the install.

When the upgraded device is rebooted, check the dashboard to check the version, wait for all the interfaces to come backup green.

If the device is still in suspended state make it functional again

From the CLI

> request high-availability state functional

From the GUI

Go to Device > High Availability > Operational Commands  > Make Local Device Functional


Repeat steps on other firewall.


Suspend Primary Device

From CLI

> request high-availability state suspend

From the GUI

Go to Device > High Availability > Operational Commands  > Suspend local device.


*The Backup Firewall will become Active – it does take 30-45 seconds so don’t panic


Install the new PAN-OS on the suspended device:

Device > Software > Install

Reboot the device to complete the install.

When the upgraded device is rebooted, check the dashboard to check the version, wait for all the interfaces to come backup green.

If the device is still in suspended state make it functional again

From the CLI

> request high-availability state functional

From the GUI

Go to Device > High Availability > Operational Commands  > Make Local Device Functional

To Get Primary Back to Primary by suspending the backup (current active) firewall (The Original Backup Firewall)

From the GUI,

Go to Device > High Availability > Operational Commands  > Suspend local device.

Once the Primary became active again, enable the suspended backup firewall

Enable TCP-Reject-Non-SYN, so that sessions can failover even when they are not in sync. : (Do this on both Firewalls)

# set deviceconfig setting session tcp-reject-non-syn yes
# commit


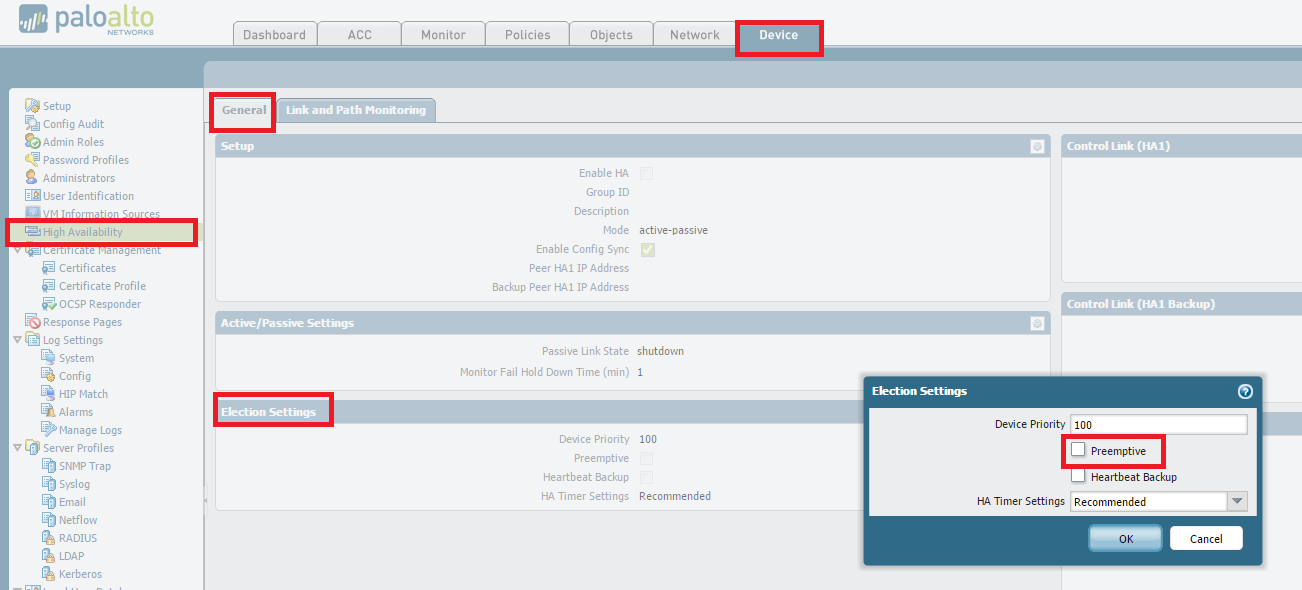
Re-Enable preempt configuration change must be committed on both peers. To re-enable preempt, go to Device > High Availability > Election Settings and uncheck Preemptive.  Then, perform a commit.


How to Downgrade

If an issue occurs on the new version and a downgrade is necessary:

To revert to the previous PAN-OS screen, run the following CLI command:

# debug swm revert

This causes the firewall to boot from the partition in use prior to the upgrade. Nothing will be uninstalled and no configuration change will be made.


However please be aware while running this command –

After rebooting from a SWM revert, the configuration active at the time before upgrade will be loaded with the activation of the previous partion. Any configuration changes made after upgrade will not be accounted for and will need to be manually recovered by loading the latest configuration version and committing the changes.

Palo Alto : Reconnaissance Protection Whitelist

Recently I have been implementing a software called Insight VM by Rapid 7 which runs reconnaissance on our network looking for vulnerabilities. Whilst this software is scanning, I was finding the Firewall would block it (like its supposed to) and then complain like crazy that it and its Network was being targeted. 27,000 email over night I decided to research how to solve this issue. Luckily Palo Alto have thought about this.

Here is how to implement Reconnaissance Protection Whitelist:

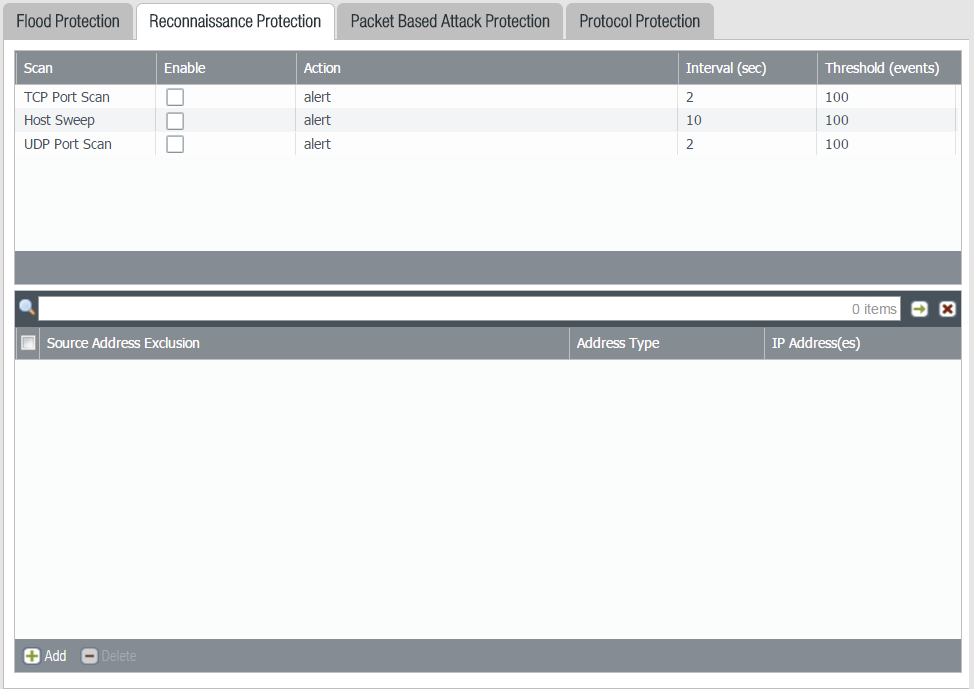
Select Network>Network Profiles>Zone Protection>Reconnaissance Protection to add a source address exclusion whitelist to your zone protection Profile.

Add an address to your source address exclusion whitelist. You add up to 20 IP addresses or netmask address objects.

Data Centre : Post DC Move Unracking

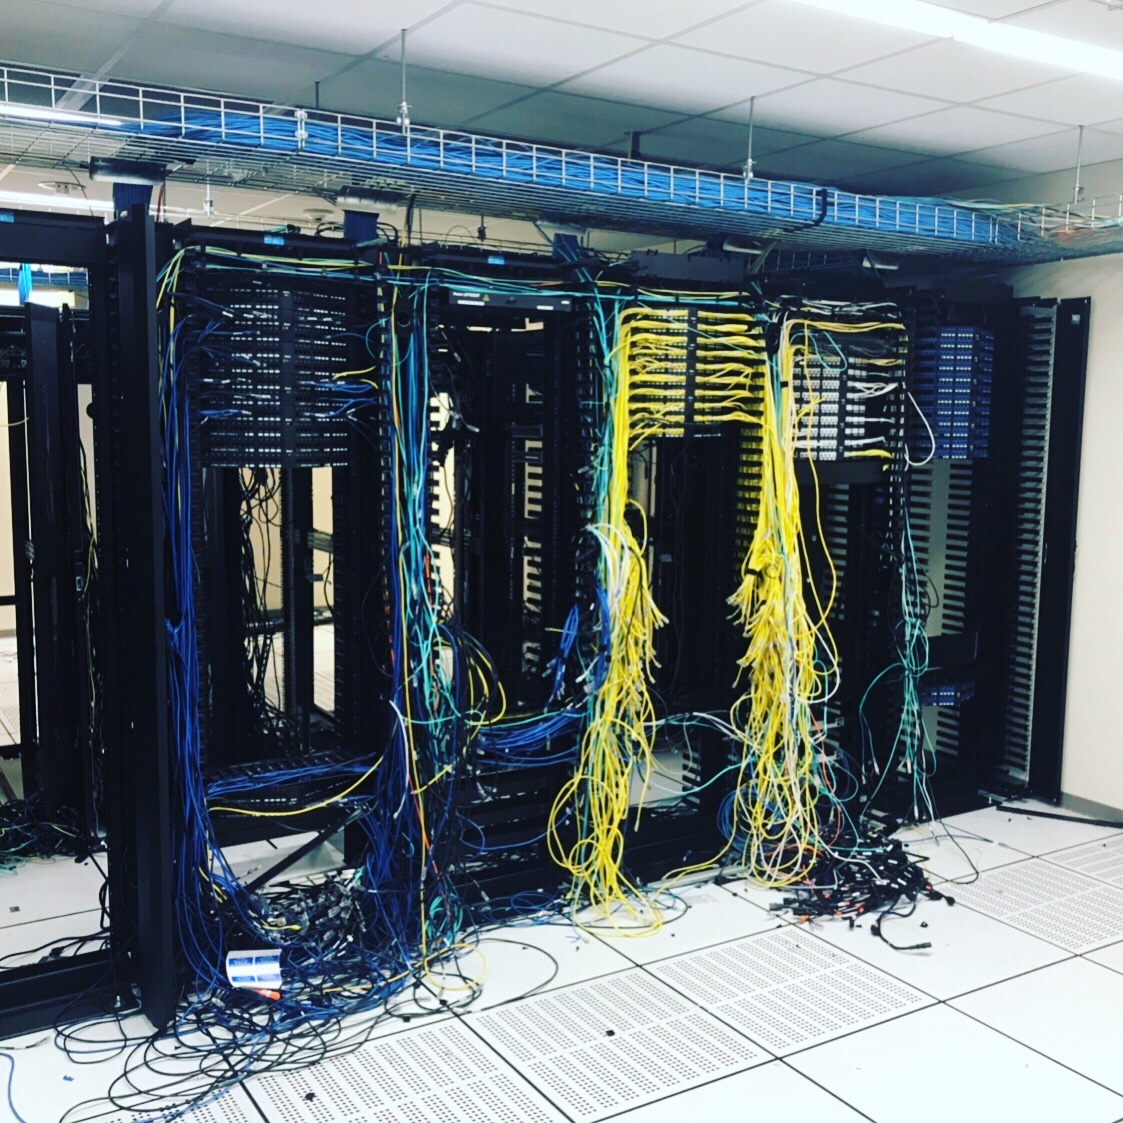
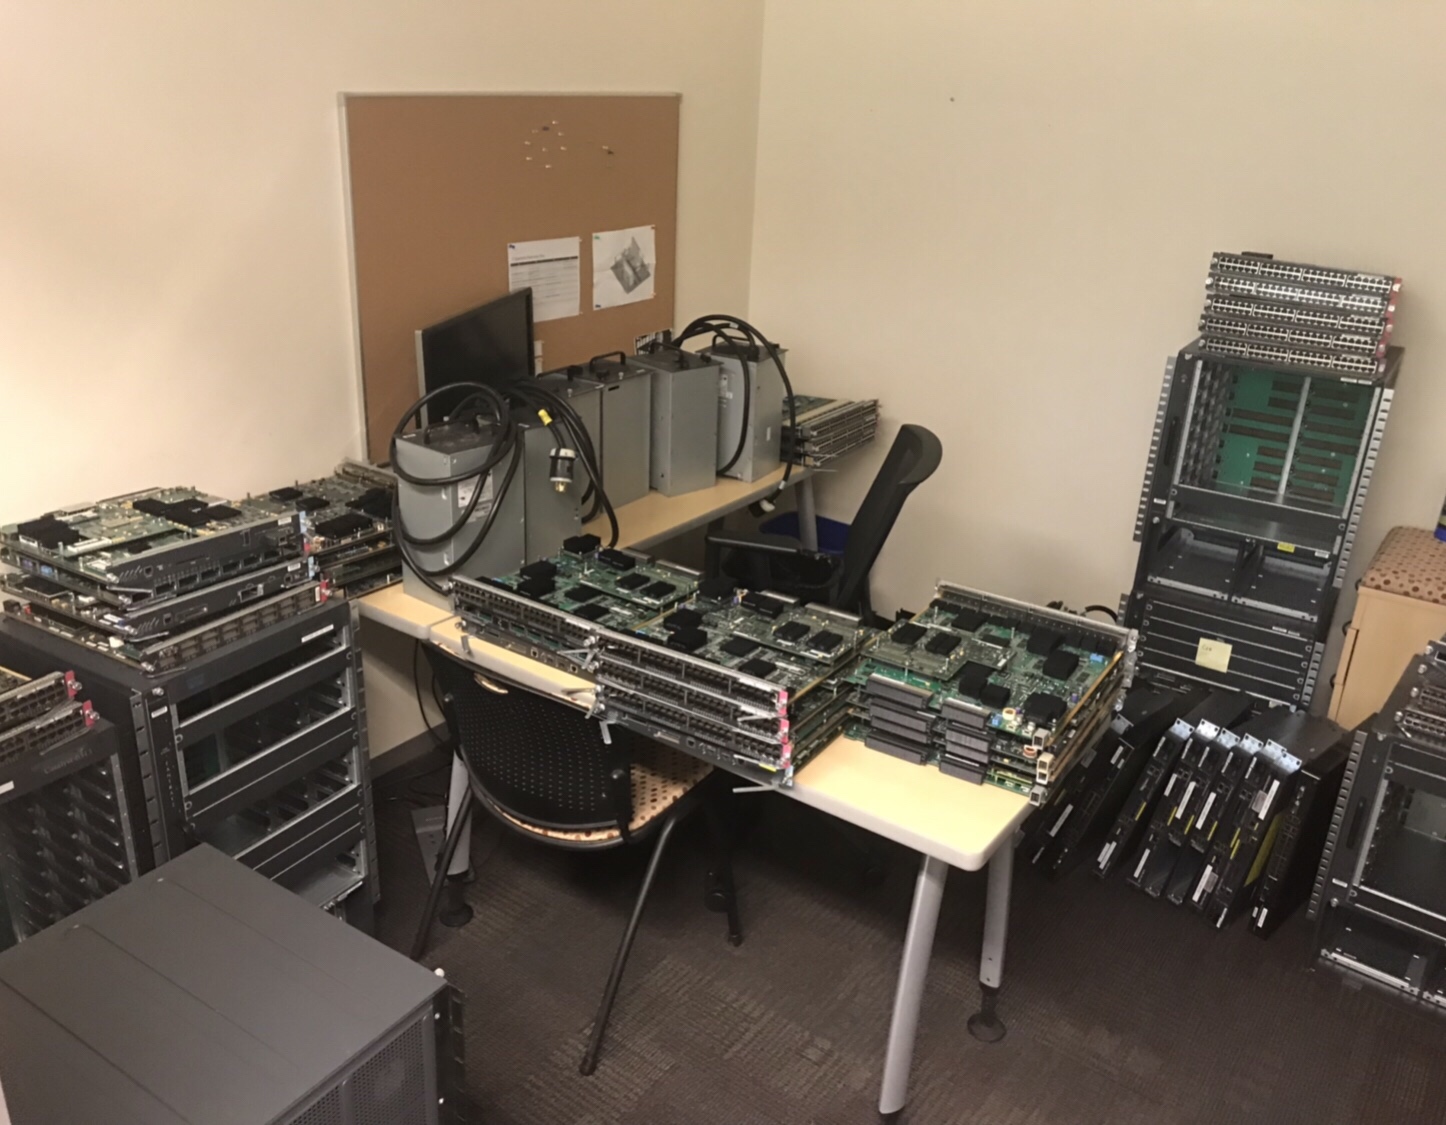
We moved our company internal Data Centre to a COLO Facility 2 weeks ago, here is what is left. Before and After Pictures, as well as a photo of the “Boneyard”. A pretty good haul for E-Wasting:

2x Cisco 6909’s

3x Cisco 6513’s

8x Cisco ASA’s

2x Brocade Loadbalancers

4x Cisco 2900 Routers

2x Cisco Nexus 5k

1x Cisco Wireless LAN Controller


GNS3 : Install and Configure

This install is intended for running IOU/IOL images on the GNS3 VM because it is the preferable way of running IOS in GNS3 now.

Pre-Requisites:

  1. Install VMware Workstation Player
    http://www.vmware.com/products/player/playerpro-evaluation.html
  2. Install VMware VIX API
    https://www.vmware.com/support/developer/vix-api/
  3. Install Wireshark
    https://www.wireshark.org/download.html
    Install WinPCAP provided by Wireshark


Install GNS3:

  1. Install GNS3
    https://www.gns3.com/software/download
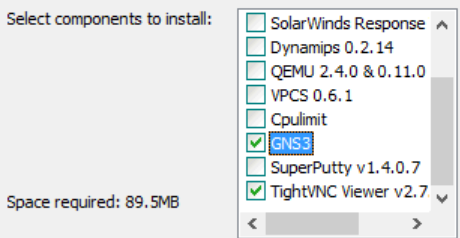
  2. Install only the following components:

  1. We don’t need Dynamips/QEMU/VPCS/Cpulimit because we’ll be running everything off of the GNS3 VM server.  We don’t install SuperPutty from here because its not the latest version and the first thing it does when you open it is bug you about upgrading to the latest version.  There are setup instructions for it below.

Install Loopback Adapter

  1. Open an Admin Command Prompt

cd “c:\Program Files\gns3”

loopback-manager.cmd

  1. Install a new Loopback interface (reboot required)
  2. Reboot
  1. Rename the new Loopback adapter to “Loopback”
  2. Assign it an IP address


Setup GNS3 VM:

  1. Download the GNS3 VM version that matches the installed GNS3 version
    https://github.com/GNS3/gns3-gui/releases
  2. Import the VM and keep the defaults
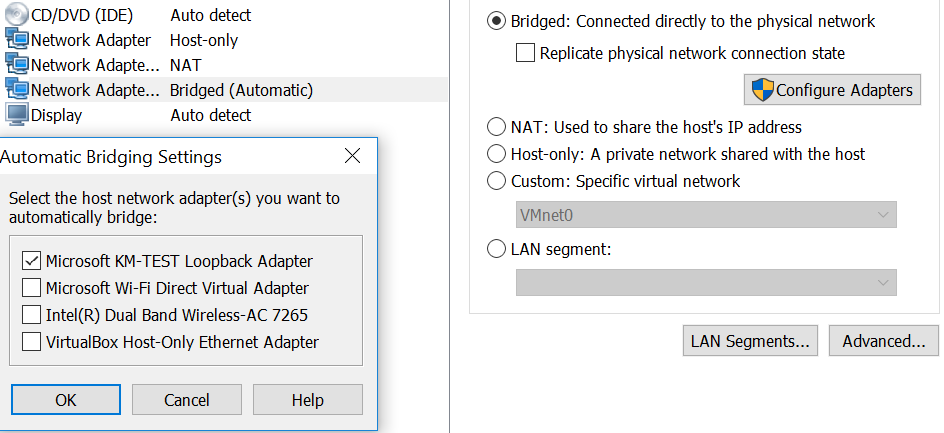
  3. Add a 3rd Network Adapter that will be in Bridged mode and connected to the Loopback adapter (Microsoft KM-TEST Loopback Adapter)

  1. Power on the VM
  2. SSH into the VM using gns3/gns3 for the credentials
    1. Sudo to root and run the following:
      1. echo ‘127.0.0.127 xml.cisco.com’ >> /etc/hosts
  3. Leave the VM powered on, we’re done with it for now
  4. Open an Administrator command prompt
  5. cd into the GNS3 install directory and run the following:
    1. IMPORTANT: On my work laptop, added the additional interfaces broke network connectivity to the VM after they were added.  I have no idea why but after I reinstalled VMware Workstation which uninstalled all the adapters, I was able to connect to the VM again.  On the work laptop, I’m running without the additional adapters and it seems fine so far.
    2. vmnet-manager.cmd
    3. Select option 1 which will add the vmnet interface 2 to 19 (this can take a while, please be patient)
    4. If it looks like this process has hung, you follow step 2 in the url below to add the adapters
      https://www.gns3.com/support/docs/how-to-use-vmware-player-in-gns3


Configure GNS3 to use the GNS3 VM server:

  1. Open up GNS3
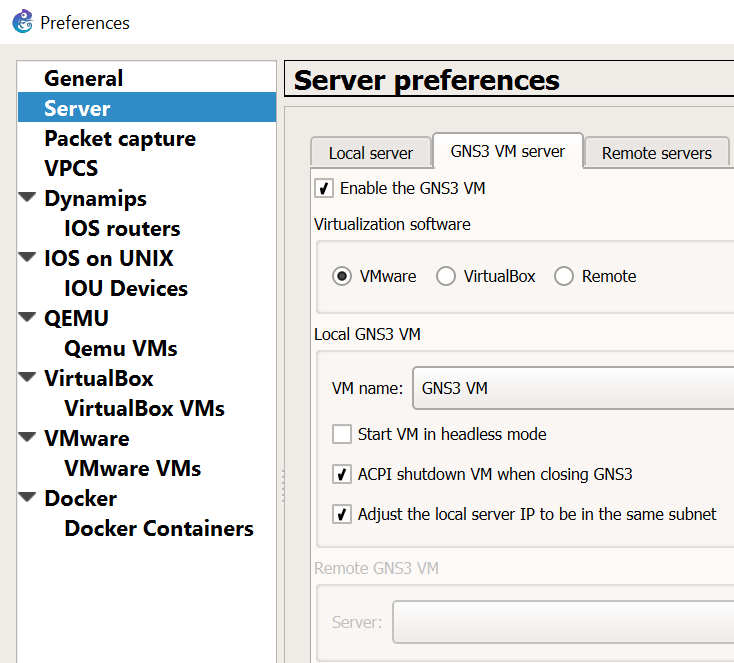
  2. Goto Edit > Preferences

    Be sure to leave “Start VM in headless mode” unchecked.  I ran into issues where the VM would not automatically startup when opening GNS3 and also cause the GNS3 process to linger when closing out of it.
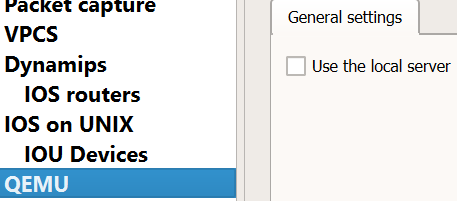
  3. Disable “Use of the local server” for Dynamips and QEMU.  We’ll use the GNS3 VM instead for running those processes.

Packet capture VPCS Dynamips IOS routers General settings Use the local server Path to Dynamips:


Create the L2/L3 IOU Devices:

  1. Goto Edit > Preferences
  2. Set the iourc file to use with the license (IOU devices need a license to run)
  3. Create the L2 image:
  4. Create the L3 image:

Add Device Image

New appliance template > Add and IOU > Run the IOU > New Image > Browse


i86bi-linux-l2-ipbasek9-15.1e.bin – IOU-L2

i86bi-linux-l3-adventerprisek9-15.4.2T.bin – IOU-L3


Operational Notes:

  • Sometimes a restart of all the routers/switches are required when new links are created between devices.  Even though the line protocols show as up, I’ve found a restart is required for traffic to actually pass through them.


If you want to use SuperPutty as the SSH client for GNS3 click this link:
SuperPutty with GNS3

Cisco : Serial Numbers

Today I have spent some time trying to find serial numbers on multiple Cisco devices, some Routers, Switches, Firewalls and Wireless LAN Controllers. Here is 7 ways I have found:

  1. Locate the serial number tag on the device chassis.
  2. The serial number is displayed in the banner during boot.
  3. “show version” command. (Look for Processor board ID or S/N)
  4. “show inventory” command. (Look for Hw Serial# or SN:)(Also works on WLC’s)
  5. “show diag” command. (Look for Chassis Serial Number)
  6. “show hardware” command. (Look for Processor board ID or S/N)
  7. “show tech-support” command.